by Stacey Wiseman | Jun 10, 2013 | Inspiration, Photo Book Design Layout, Podcast
Do you have hundreds of your kid’s paintings laying around? You love them all but no sure what to do with them. You don’t really need to keep them all…but you hate to throw them away.
How about putting them in your photo book!
This is a great way to document and preserve them but not have them physically around. It makes your conscience feel a little better throwing them away to know that they will be in your photo book at the end of the year.
Of course you could frame a couple of your favorites but putting them in a book allows several to be on a spread every month so you can have variety and color all in one place.
Here are a couple of tips for including paintings, drawings or crafts in your photo book.
– 1 – Taking the Photos
When turning artwork into jpegs, the important thing is to standardize. Scanning is obviously the easiest way to achieve this because you can line up the artwork on the scanning guides. And it flattens the work while it scans.
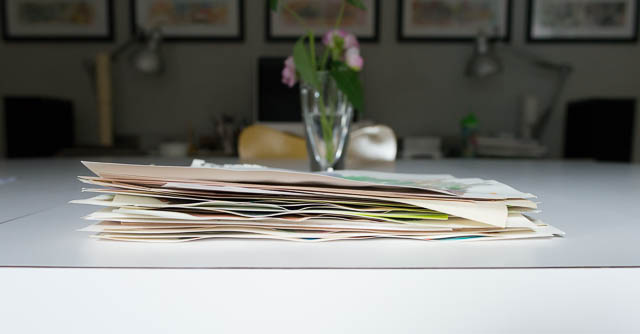
If your scanner is not as accessible (as mine is) or the artwork is larger than the glass (again, my case here), then taking photos of the artwork is the next best option. Wait until you have a stack of artwork and set up an area to take the photos one by one.
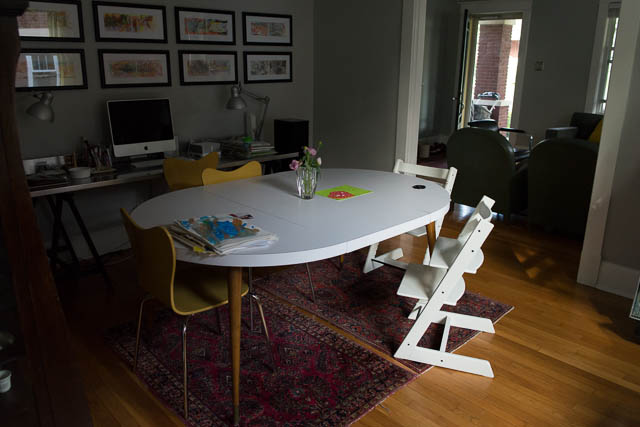
In this example, I used our dining room table. Although it’s not terribly bright, there was a nice gentle light in which to photograph. Setting up a tripod, in this case, setting it on the table, would help to standardize the process – every frame would be exactly the same.
 For this example, I decided to use a wall surface to photograph the work. Obviously the clipboard and the wall would be in each photo, but that could also add a design element to the layout. If you don’t want the clipboard showing, you could always use tape (adds a bit of time). Shooting on the wall is helpful because you can minimize the shadow created by the artwork itself.
– 2 – Editing the Photos
Next, you should import your photos using the method you typically do for sorting and editing. I use Lightroom, so I created a separate special collection with a keywork “artwork.” This helps to keep all of my kid’s artwork in one place in my catalog.
Then I added a noise reduction, slight increase in exposure and vibrance, and lifted the shadows a touch in my tone curve. I created my own preset to save time in the future.
Finally, I exported the photos at 300 dpi to the approximate image size in my photo book.
– 3 – Layouts
There are several different options for using artwork in your book.
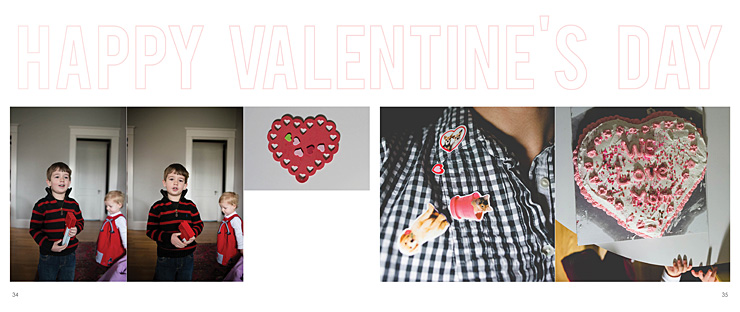
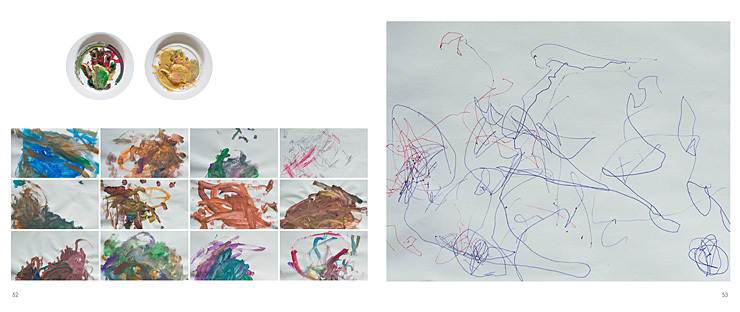
In this example, the craft is added directly to the layout with photographs.
[divider]
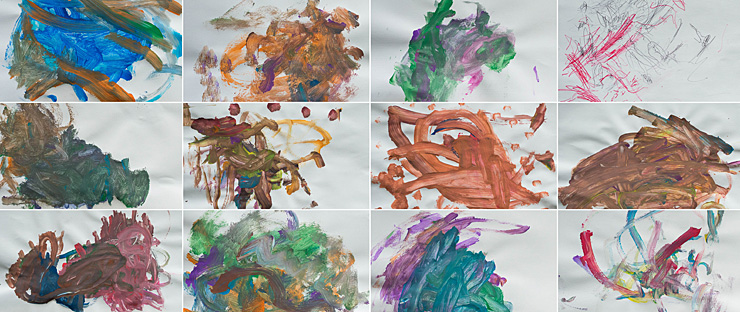
This example features a grid of the paintings on one spread.
Here is how it would look with individual artwork from each of my kids.
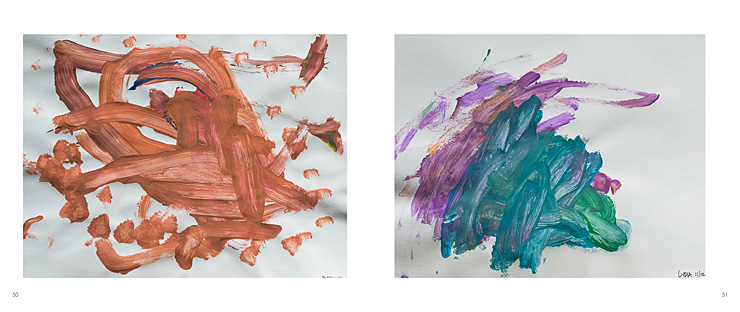
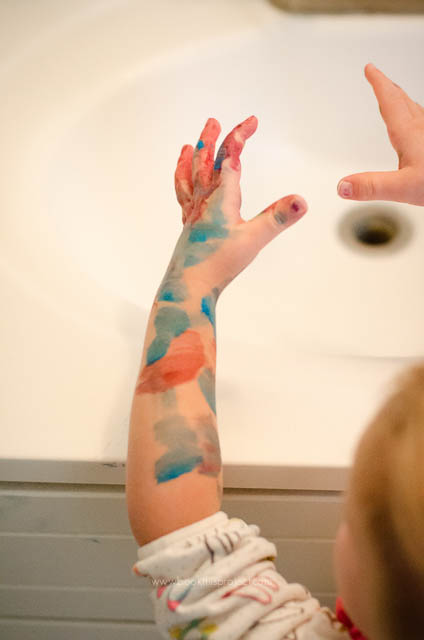
Finally, here is a combination of the above. I have individual works from my kids (their handprints), a small grid of paintings, and a large drawing on the right hand side.
Here is a video providing a little more detail into how I took, edited and placed my kid’s artwork into a photo book.
Leave a comment below telling me your favorite option or what you do to preserve your kid’s artwork!
by Stacey Wiseman | May 20, 2013 | Photo Book Design Layout, Podcast
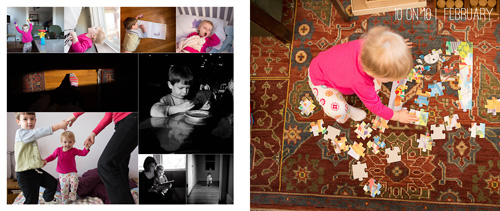
In this month’s podcast, I illustrate how I changed a photograph for my full spread divider and how I create a little more variety while maintaining constant elements.
For February, I ended up selecting 89 photos for contention. Quite a bit more than my 43 in January…but somehow I found a way to keep to my outline and not create additional pages.
Here are the pages featuring my February photos in my family photo book.
Now it’s time to check out my short video to see me walk through the pages!
by Stacey Wiseman | Apr 10, 2013 | Family Photographs, Photo Book Design Layout, Podcast
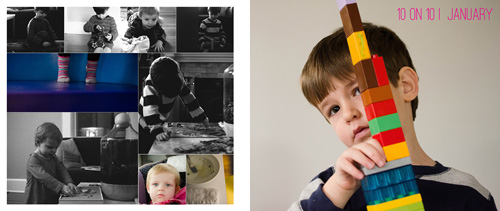
It’s time for another video podcast where I illustrate steps / tutorials / examples for photo books. If you remember last month’s podcast, I started to fill in my outline with my monthly photo project – 10 photos in 10 hours. In this month’s video podcast, I fill in my 2013 January photos. You will see how I select photos and how I varied my layouts. And I critique my layouts – so you will see what I hope to change.
My goal is to show you my thought process as I design a photo book. Whether I’m designing your photo book – or you’re designing your own – you will see how the pages begin to come together. I’ll reveal a little bit of the design process each month – so make sure you follow along! Did you know you can sign up for my podcast feed in iTunes!
I’m really excited about this video because I’ll explain why I passed on this image with my son’s locked focus:

[divider] and instead selected this less than stellar image for my photo book.
[divider]
Make sure you leave a comment below with your favorite spread!
by Stacey Wiseman | Mar 14, 2013 | Family Photographs, Photo Book Design Layout, Podcast
In this month’s podcast, I’m showing you how I design my family photo book, step by step. For this video, I’m illustrating how I designed my January and February 10 photos in 10 hours challenge.
Even if you are not participating in this challenge, it will show you how I export and select my photos for a layout.
If you are designing your own photo book, I hope you’ll follow along with me as I design my 2013 book. And if you’re interested in having me design your photo book, this will provide some insight and tools into what I can do for your photographs!
If you have any questions or comments, make sure to leave them in the comments below!
by Stacey Wiseman | Jan 10, 2013 | Photograph, Podcast
January is the perfect time to assess the year that just passed and look forward to the upcoming year. Even with my family photos, I think it is important to review my photographs in order to figure out what I want to accomplish next year. (skin tones + consistent editing!)
I love seeing all of my photos in one place. It’s one of the main reasons I love photo books!
A little backstory. In May, the band The Walkmen released their latest album, Heaven. I immediately fell in love with the video of their title track. I loved the blend of music + family, stills + video.
I really wanted to capture this spirit for my own family.
I decided to implement this inspiration into my end-of-the-year video. It combines some of my favorite ‘mommy’ photos and videos. It’s not perfect. Some are out of focus. Some crazy skin tones. But I don’t care. I still love it. It is a perfect encapsulation of 2012.
I would LOVE for you to check it out.
2012 End of the Year from Stacey Wiseman on Vimeo.
Now! I would LOVE for you to make one of your own. In this month’s podcast, I take you behind the scenes to show you how I made this video. I provide all of the steps to re-create this on your own.
Here is your Game Plan.
1 – Download the tutorial.
2 – Print the PDF.
3 – Schedule about 4-6 hours to make one for yourself.
4 – Create your End of the Year Movie.
5 – Post and Share! I would love to see your video.
This is completely do-able!
Let me know your favorite part of the video or the best tip in the comments below!
Download
I’m trying out a new method for delivering the files. I’m working on unlocking the file right now. If you’re having problems, check back tomorrow! Thanks 😉
by Stacey Wiseman | Nov 15, 2012 | Photo Book Design Layout, Podcast
Are you planning on designing and ordering a family photo book before the Christmas holidays? If so, the dates are quickly approaching to when you need to finalize your design and place your order. Even though the ordering process can seem straightforward, reviewing before you order is critical to ensure a gorgeous book.
 Here are 7 simple steps to follow before you press “Order.”
1. Fix warnings
Most free online programs alert you of potential errors to your design. A common error is the image resolution being too low. You need to reduce the size of image or re-save the image at a higher resolution. Another example involves text that does not fit the text box. In this instance, you need to lower the size of the font or increase the size of the text box.
2. Ensure photos extend to edge of photo boxes and bleed edges
For any photos you want to bleed off the page, make sure they extend to the bleed line.
3. Review consistent elements (text, borders, page numbers)
If you established consistent elements at the beginning of the design process, check every page to ensure all elements have been consistently applied. This includes all text styles, borders, headers and / or footers.
4. Read through all captions
Read through all captions for any grammatical or spelling errors. A great tip is to read all text aloud. I tend to catch more mistakes this way!
5. Preform a spell check
Most programs will also have a spell check. Check the entire document before you order.
6. Print a proof, if desired
This step takes the extra measure to verify proper grammatical and design elements. Sometimes we fall into the illusion that we can catch everything on screen. Printing out your draft and reviewing the proof is visual proof you have got the book exactly the way you want it. Get out that red pen of yours and mark up your proof.
7. One Final check
After you have gone through the six steps above, I go through each page in preview mode one last time to see if I notice anything else. If I have no additional edits, I’m ready to hit that order button!
As some of you may know, my family recently returned from our yearly beach vacation. I prepared a photo book documenting our vacation. Here are a couple of pages of my book.
[divider_flat] I went through all of the 7 tips listed above and pressed “Order.” Want to see what happens next?
Watch this quick video below to de-mystify the ordering process!
Leave a comment below to let me know when you plan to order your photo book!
by Stacey Wiseman | Oct 11, 2012 | Photo Book Design Layout, Podcast
If you have been following along with the monthly podcasts, you know we have been building up a photo book. In July, we outlined a photo book in pages/excel. In August, we outlined the book in the a design program.
For today’s video, I am showing how to design the book page by page.
Let me know in the comments below: What is your most efficient technique for designing your photo book?
by Stacey Wiseman | Aug 9, 2012 | Description, Photo Book Design Layout, Podcast
It is time for another video podcast! In this month’s podcast, I translate the outline from the previous video (see this link here to watch that video!) into an actual photo book structure. Using Adobe InDesign and the free software program from Blurb, I take you step by step as we create stand-in pages for the entire book. Once the structure is in, you will have a framework – or a to-do list – to begin filling in the pages.
And speaking of starting to fill in the pages with photos…stay tuned for next month’s podcast where I start that process. Looking for the easiest way to know when this podcast is released…sign up for my free weekly email!
by Stacey Wiseman | Jul 12, 2012 | Photo Book Design Layout, Podcast
Check out the latest podcast to find out the easiest way to transform your photo book into a professional book.
To receive your free excel spreadsheet guide, click here!
Share with everybody your biggest a-ha moment you learned from this podcast in the comments below.
by Stacey Wiseman | Apr 13, 2012 | Description, Family Photographs, Photo Book Design Layout, Photograph, Podcast
The March/April podcast is finally here! It took me a while but I was finally able to pull it all together!
In this podcast, I take a simple photo book concept from beginning to end. There is a FREE companion download to this podcast. I hope you check it out and I would love to hear how it helped your photo book. Also, I would love to see any photographs or layouts you come up with! Add a comment with a link below!
Thanks and Enjoy!!!


