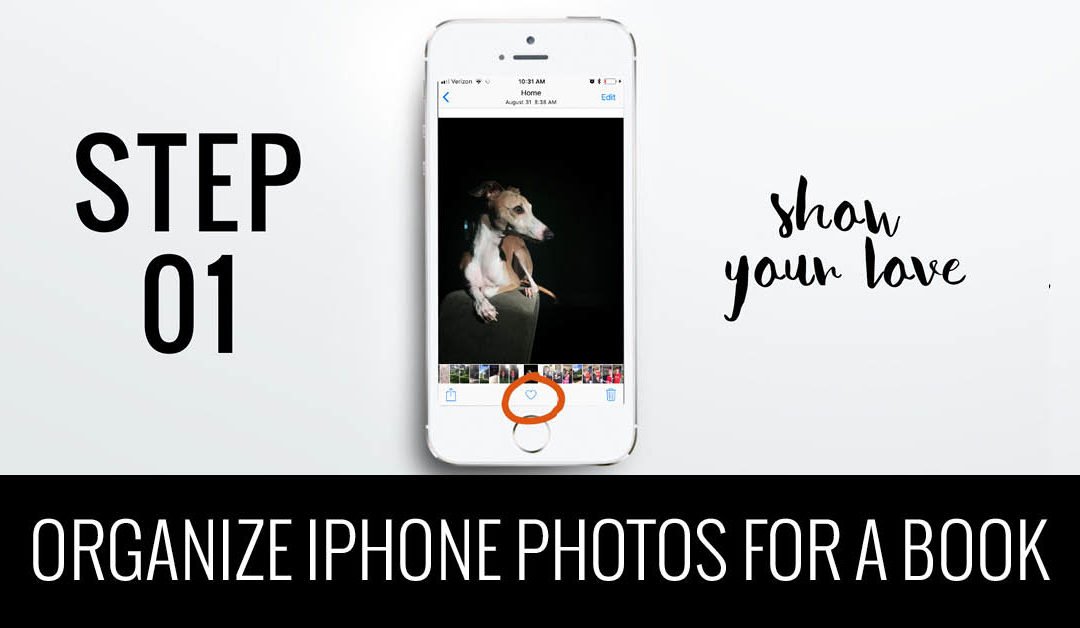
Which Photos Spark Joy?
Over and over again, I hear from people that what makes designing a photo book so difficult, is selecting photos. Even if I design a custom photo book for you, you still have to select the photos, right?!?! So it’s important to get over this hurdle and find a way to make selecting photos less of a chore and maybe even {gasp!} enjoyable!
When I first heard that Marie Kondo was translating her very popular book, The Life-Changing Magic of Tidying Up, into a Netflix show I was excited. I read her book when it first came out but tidying up always comes in waves for me. I’ll make progress over several weekends, then get derailed with life’s other demands.
This is what makes her show so enticing to me. Once I started watching the first few episodes, I realized how much it helps to see her and the families in action to get me back in gear. And whenever I fall off the tidying-up wagon, I can just watch another episode (or one I’ve already seen) to get re-inspired and make progress in my own home.
And this led me to photo selection. Kondo’s main mantra on clearing out the clutter can actually help you select photos for a photo book. As you are going through your photos, ask yourself, “Does this photo spark joy?” If so, it should definitely be flagged as a photo to print (either in a book or on your walls).
However, you also have to realize, multiple photos of the same event or
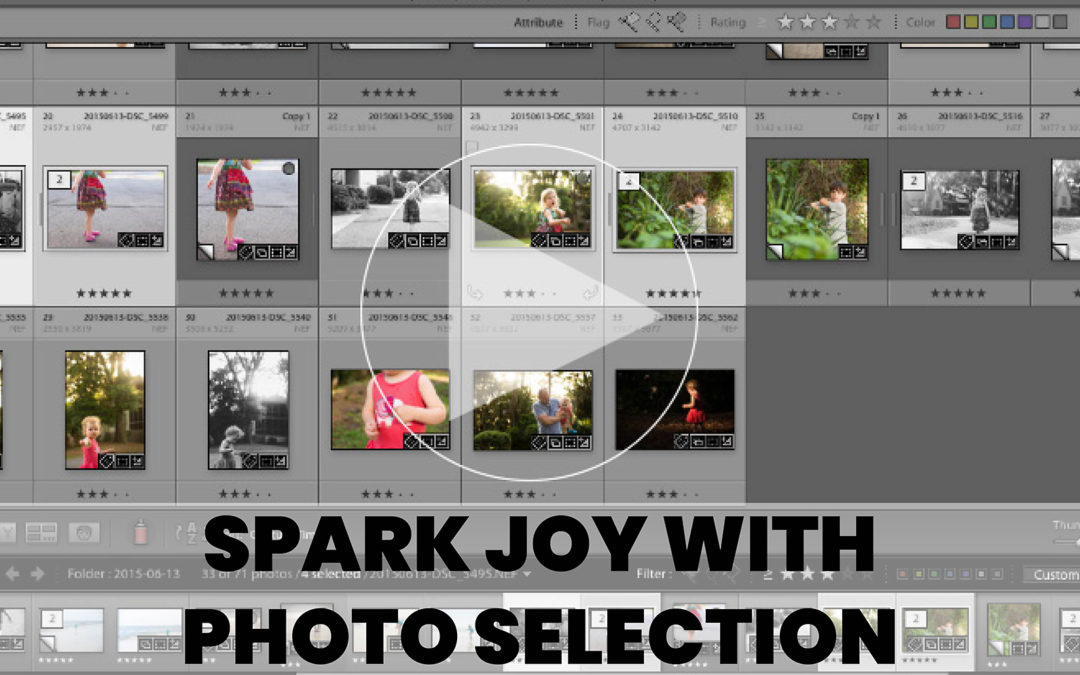
I’m sure you would say most of your photos spark joy but you have to dig a little deeper. Are you holding on to similar photos just because you have the storage space? If pressed, could you actually select the pose/photo that
Now, I would add one more question to help with your photo selection process.
How do I intend to use this photo?
Particularly when working on a photo book, it’s helpful to know if a photo is part of a series or a grouping – or – if you want it to be a stand-out photo on the page. Asking this question will help you determine if you can select a couple or if you need to be really strict and only select one.
As I mentioned earlier, actually watching someone else go through the decluttering process, helps motivate me to take action. If that sounds like you, I have a Photo Selection Guide ($5) that shows you how I selected photos from 4 different moments in my life. You’ll get access to videos walking you through my thought process while selecting photos plus examples showing how the photos ended up in a photo book layout.