With cameras on
But it’s harder for me to remember to import the photos my iPhone to use them in my photo book. With my
With the photos on my phone, there are so many other things I can do with them
In this tutorial, I’m sharing how I organize the photos I want for a photo book from my phone in 12 easy steps.
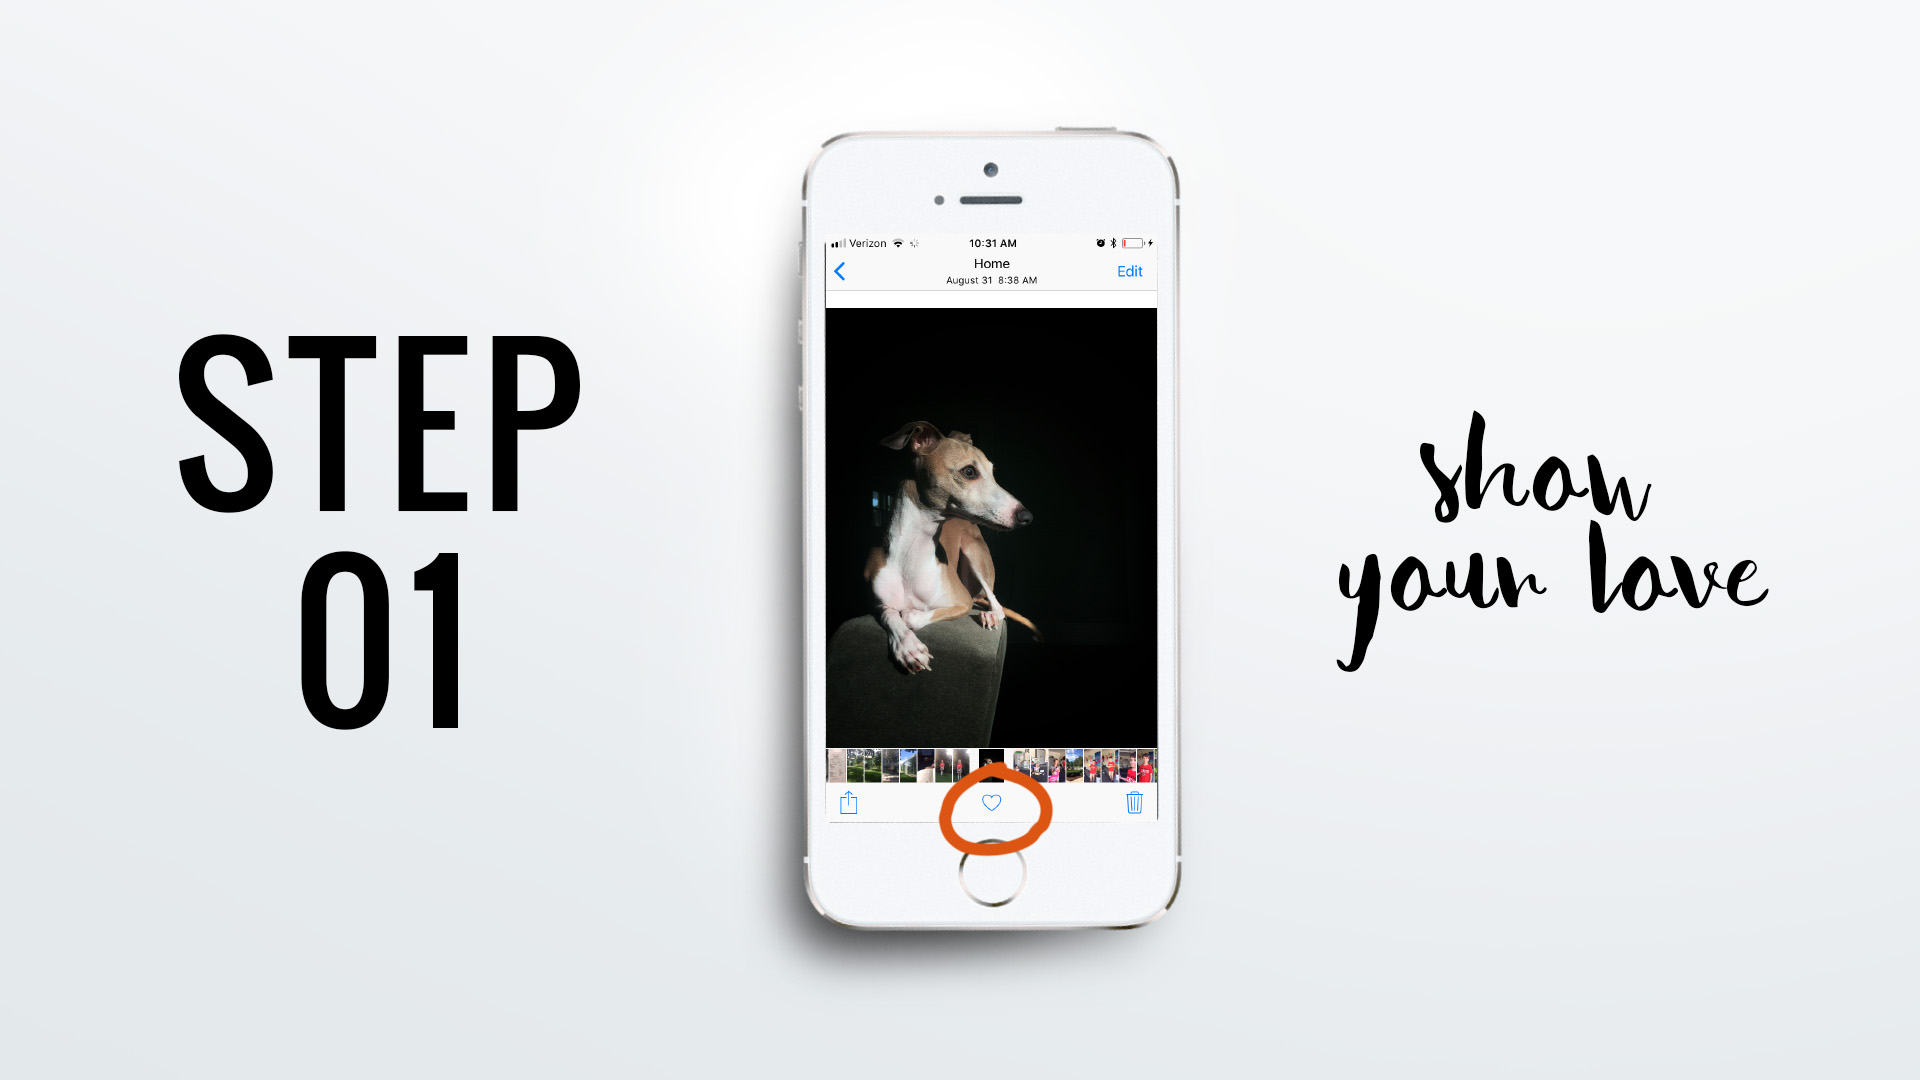
STEP 01: SHOW YOUR LOVE
The first step is to open up the Photos app on your iPhone. I look at the individual photos at full screen. If it’s a photo I want to go in my photo book, I show it some love by clicking on the heart icon at the bottom center of the screen. This marks the photo as a favorite.
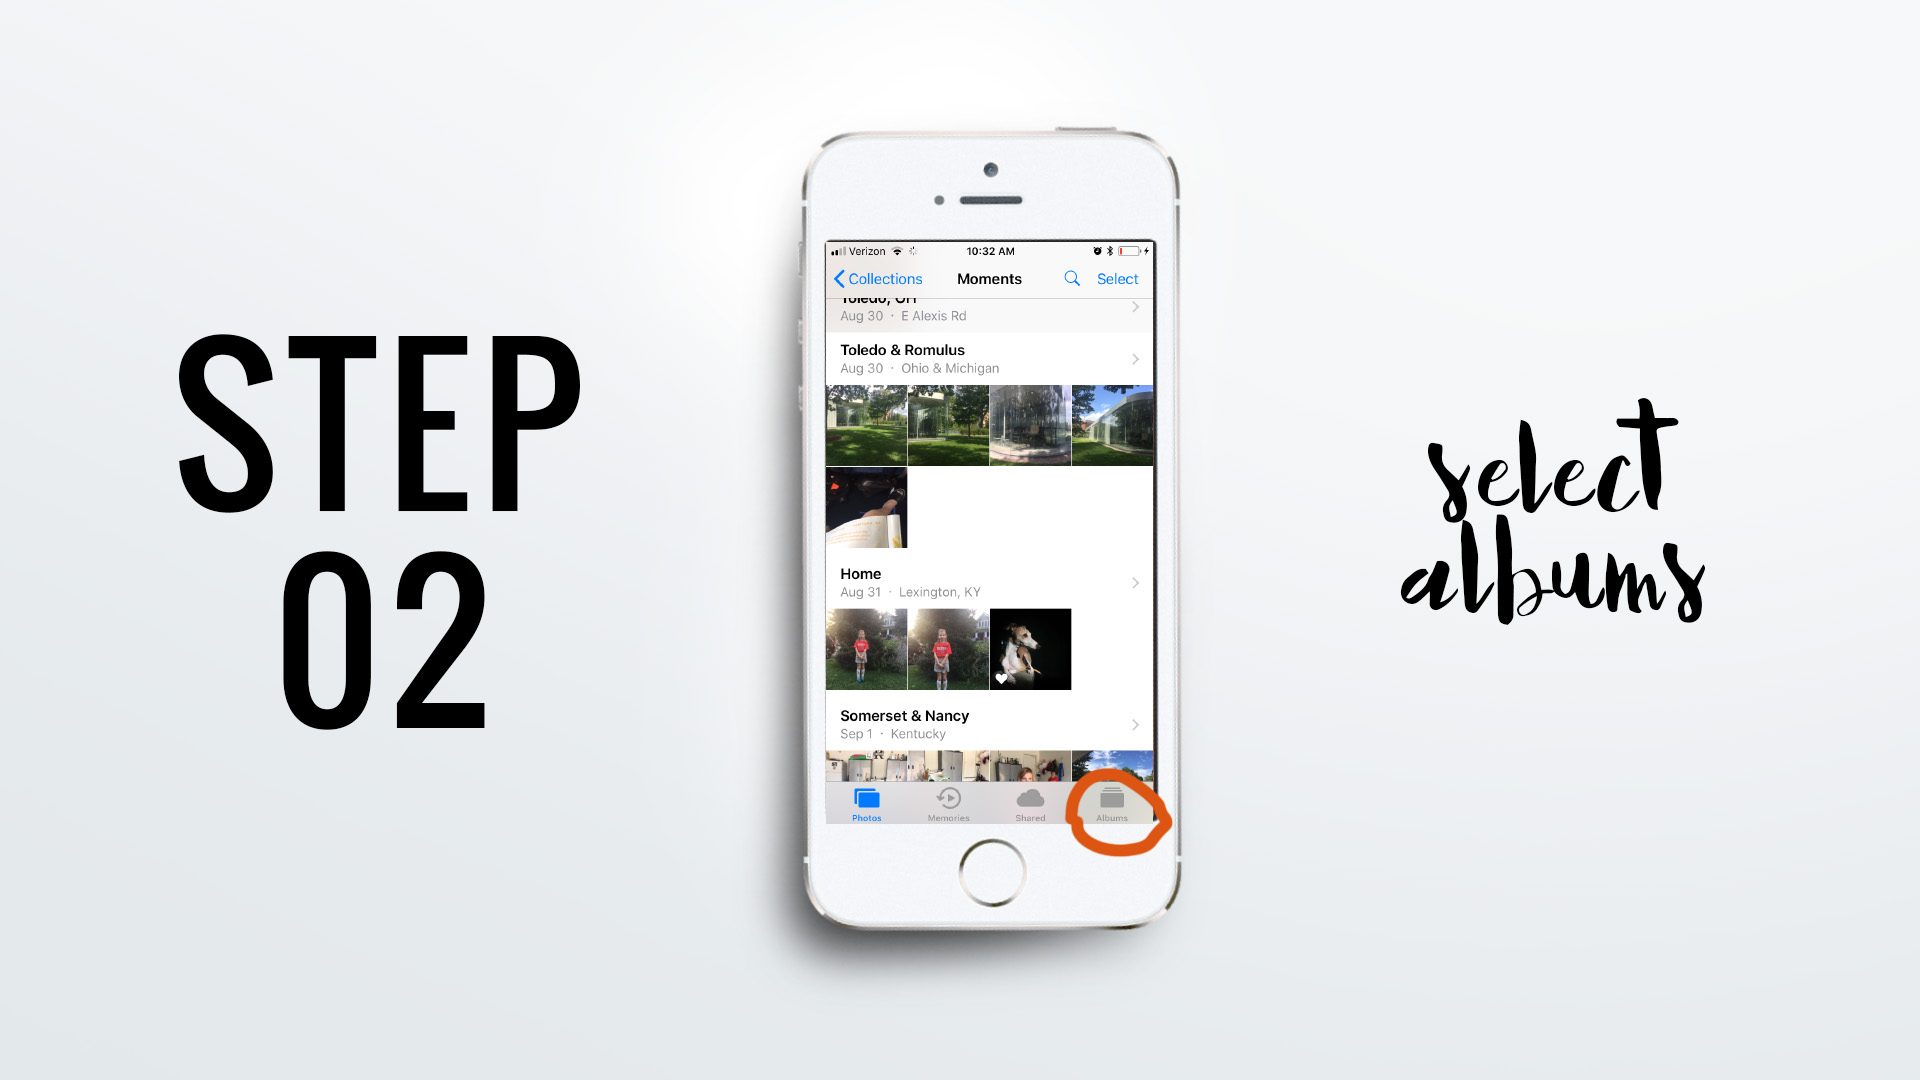
STEP 02: SELECT ALBUMS
Whenever I want to see my favorites, I back out to the Moments screen and then select “Albums” in the lower right corner of the screen. This will bring up all of the albums you’ve created.
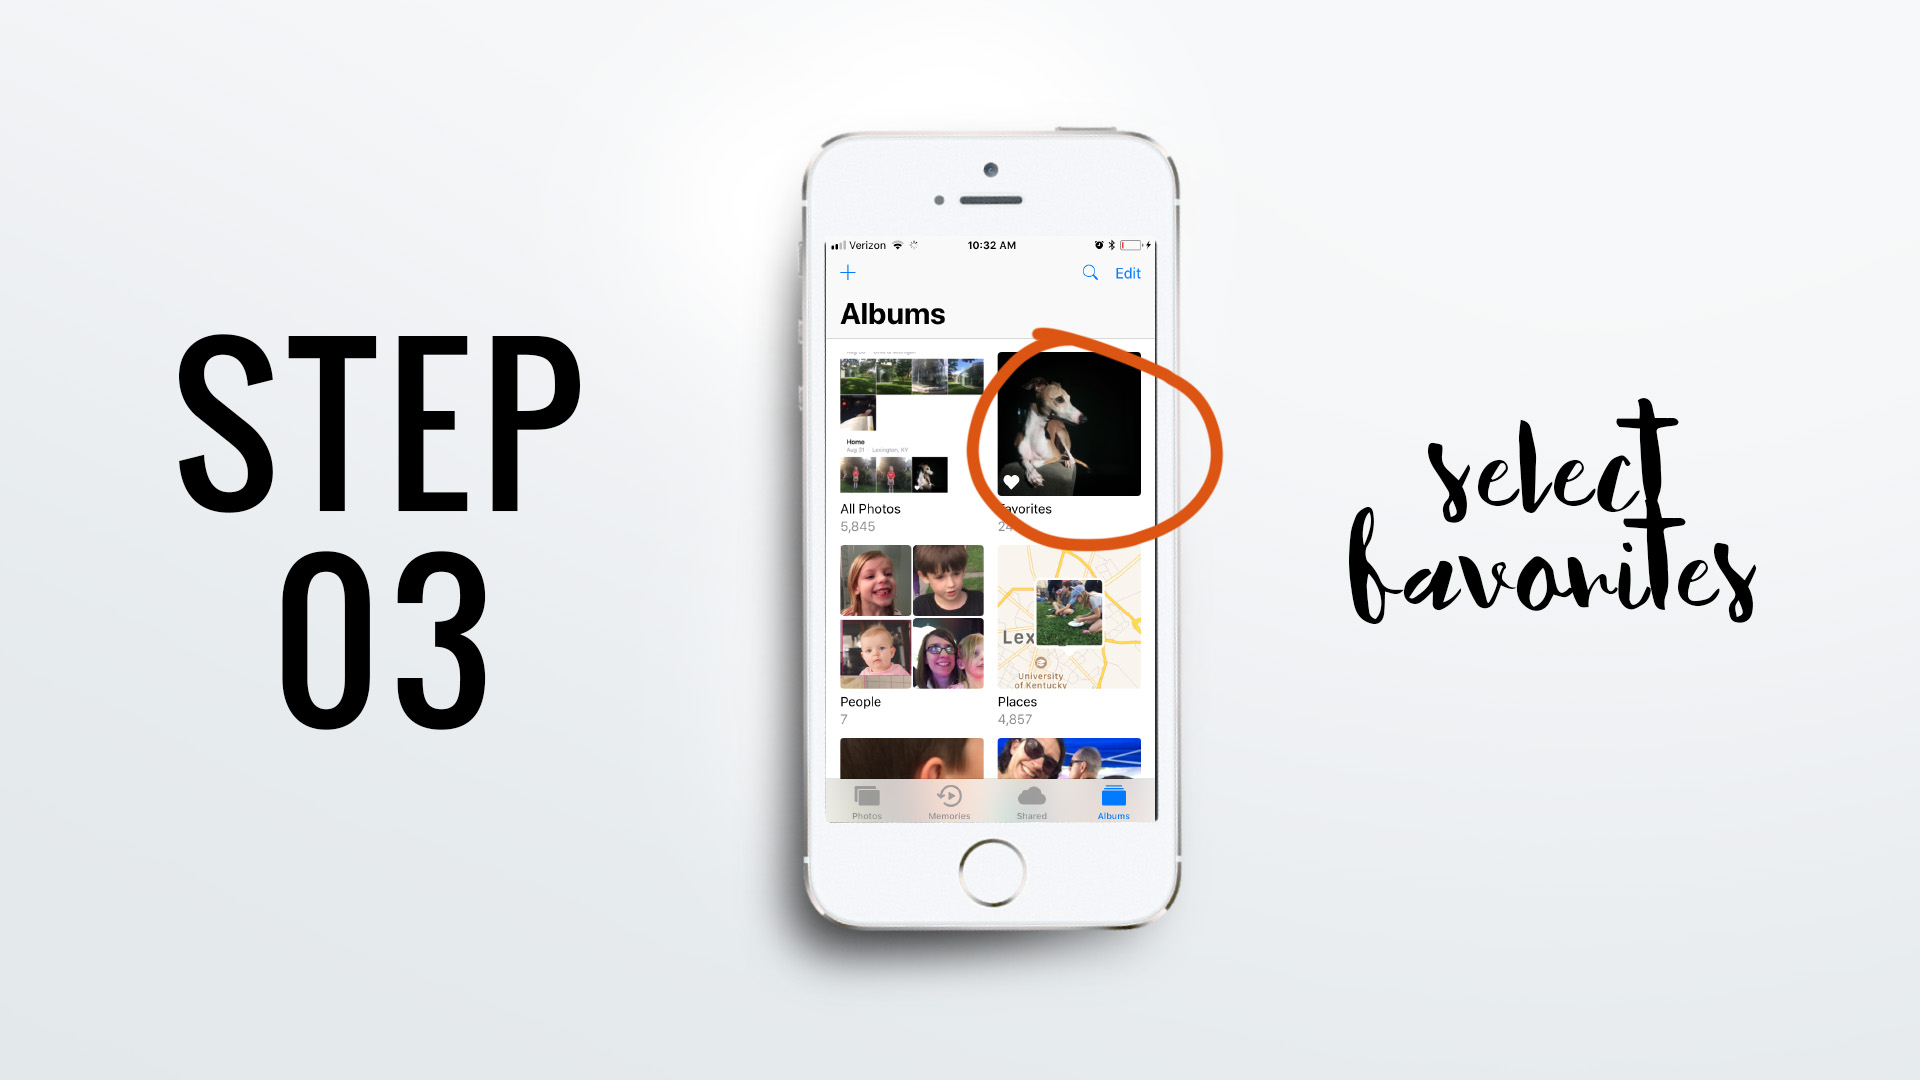
STEP 03: SELECT FAVORITES
With the photos app for iPhones, it automatically creates a “Favorites” folder and this automatically assembles all of the photos that have been marked with a heart. This is the iPhone Photos version of smart collections which makes life so much easier.

STEP 04: VIEW YOUR FAVORITES
Before I upload them to another app, I like to review all of the photos in my Favorites photo to make sure I want all of them to go in my photo book. If there is any that you don’t want to include, tap the photo, then tap the heart (to un-heart it) and the photo will remain in your collection but not in this particular album. So smart!
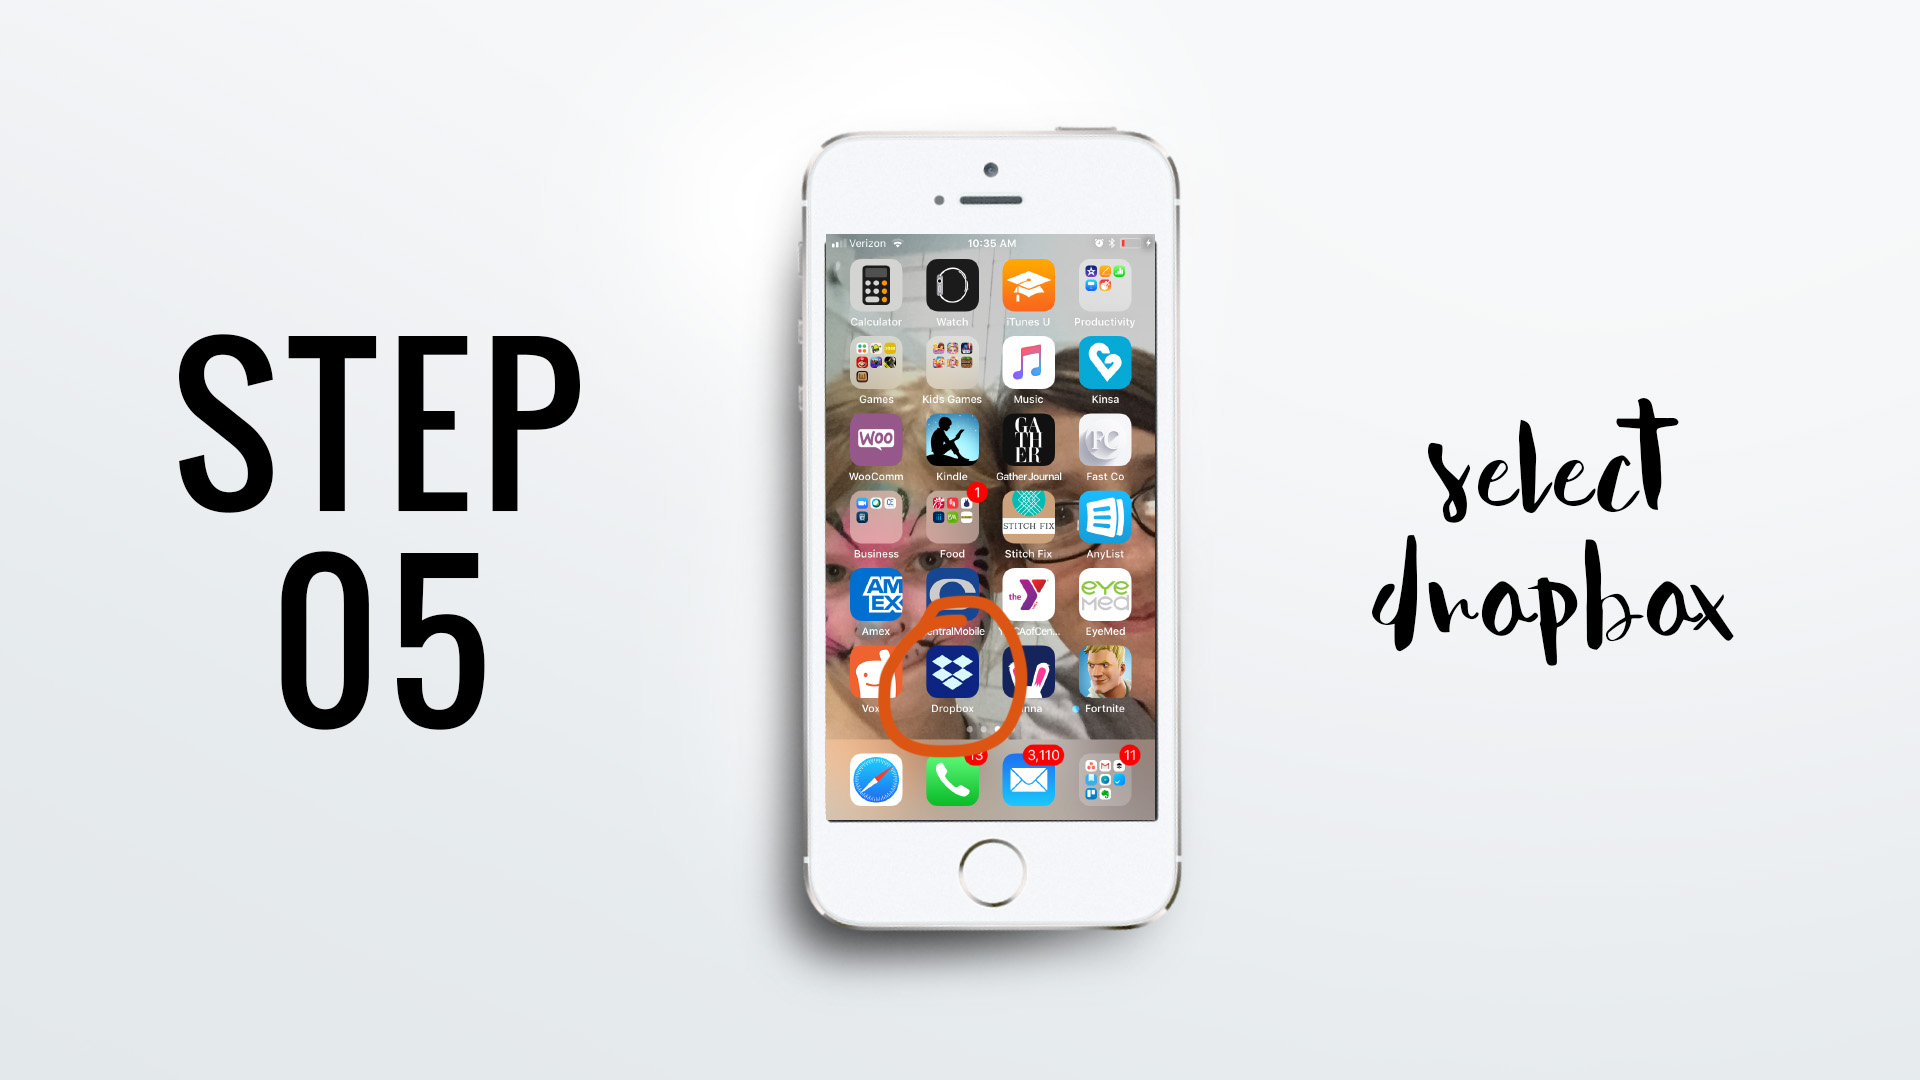
STEP 05: SELECT DROPBOX
For the next step, I want to upload the photos to a storage app such as
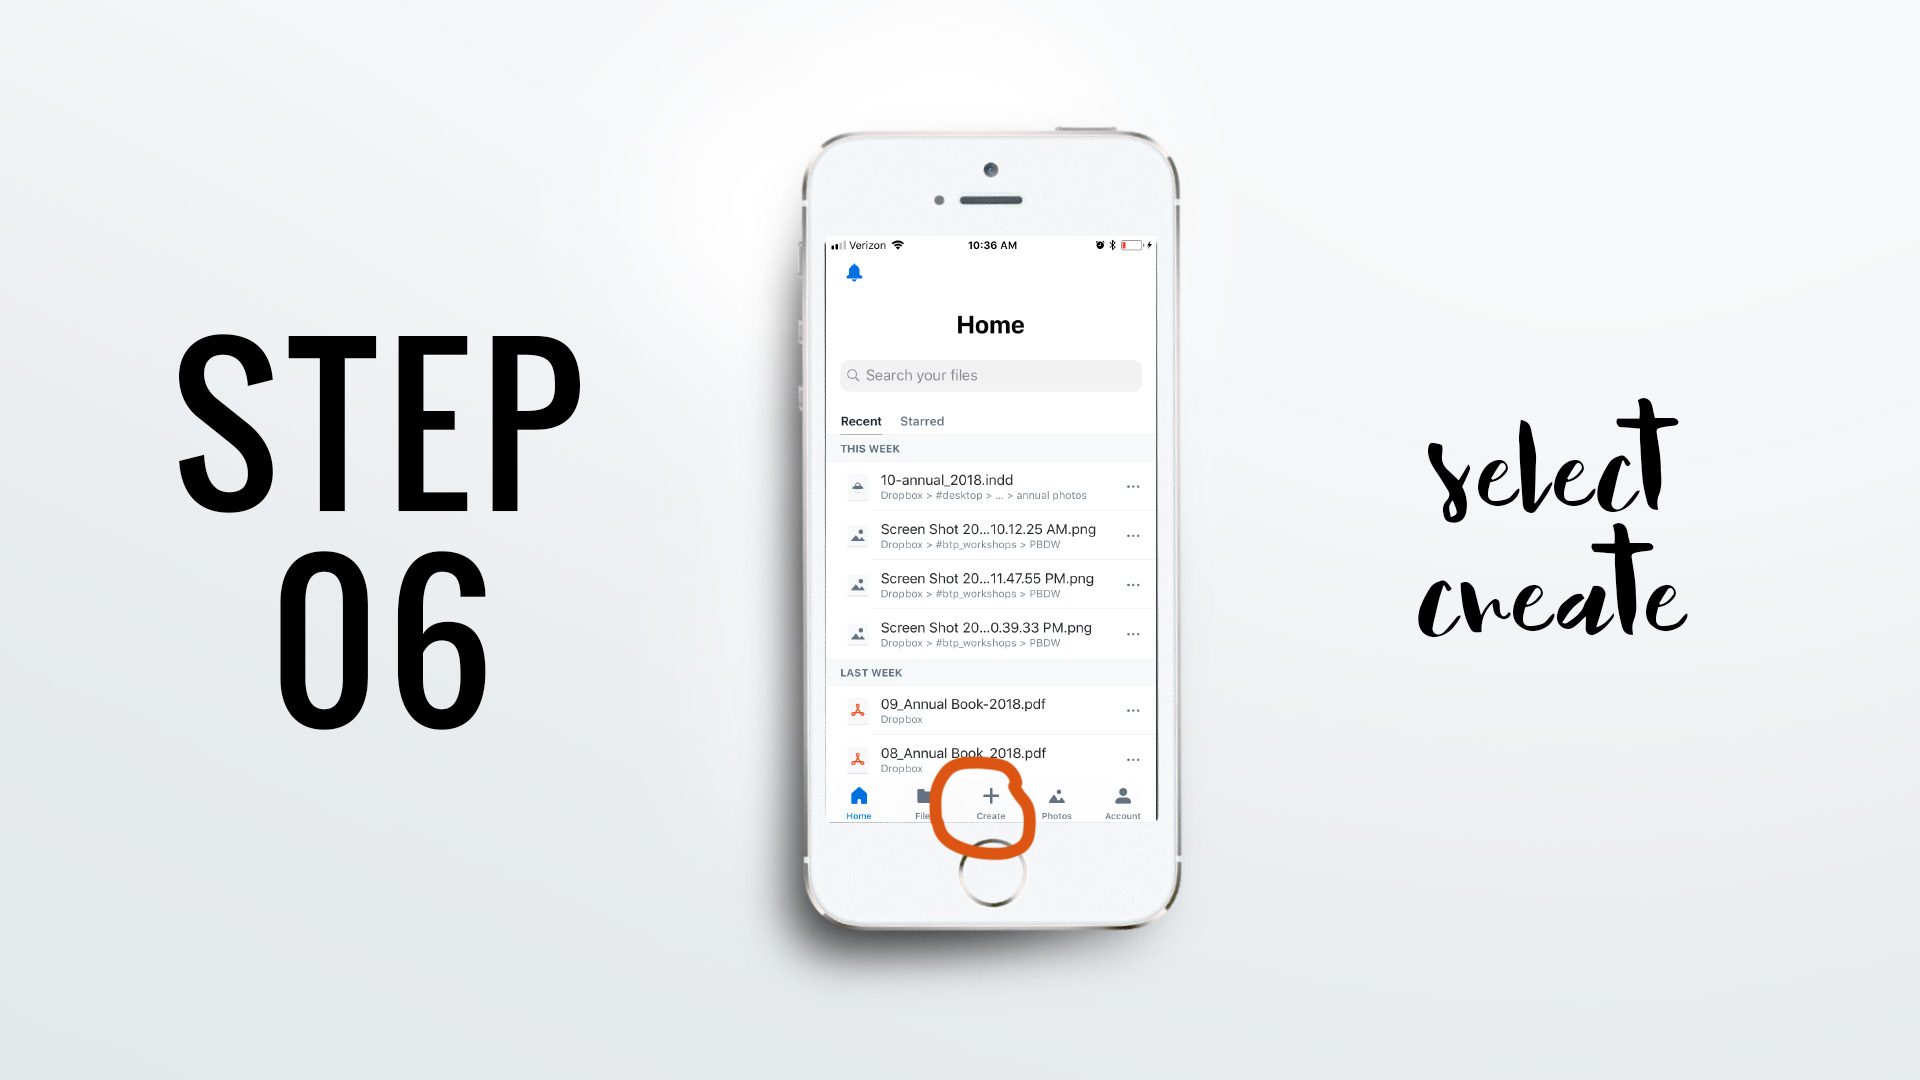
STEP 06: SELECT CREATE
Then I click the plus sign at the bottom center of the screen. By selecting “Create” (the plus sign), the app will direct you to an upload dialogue box.
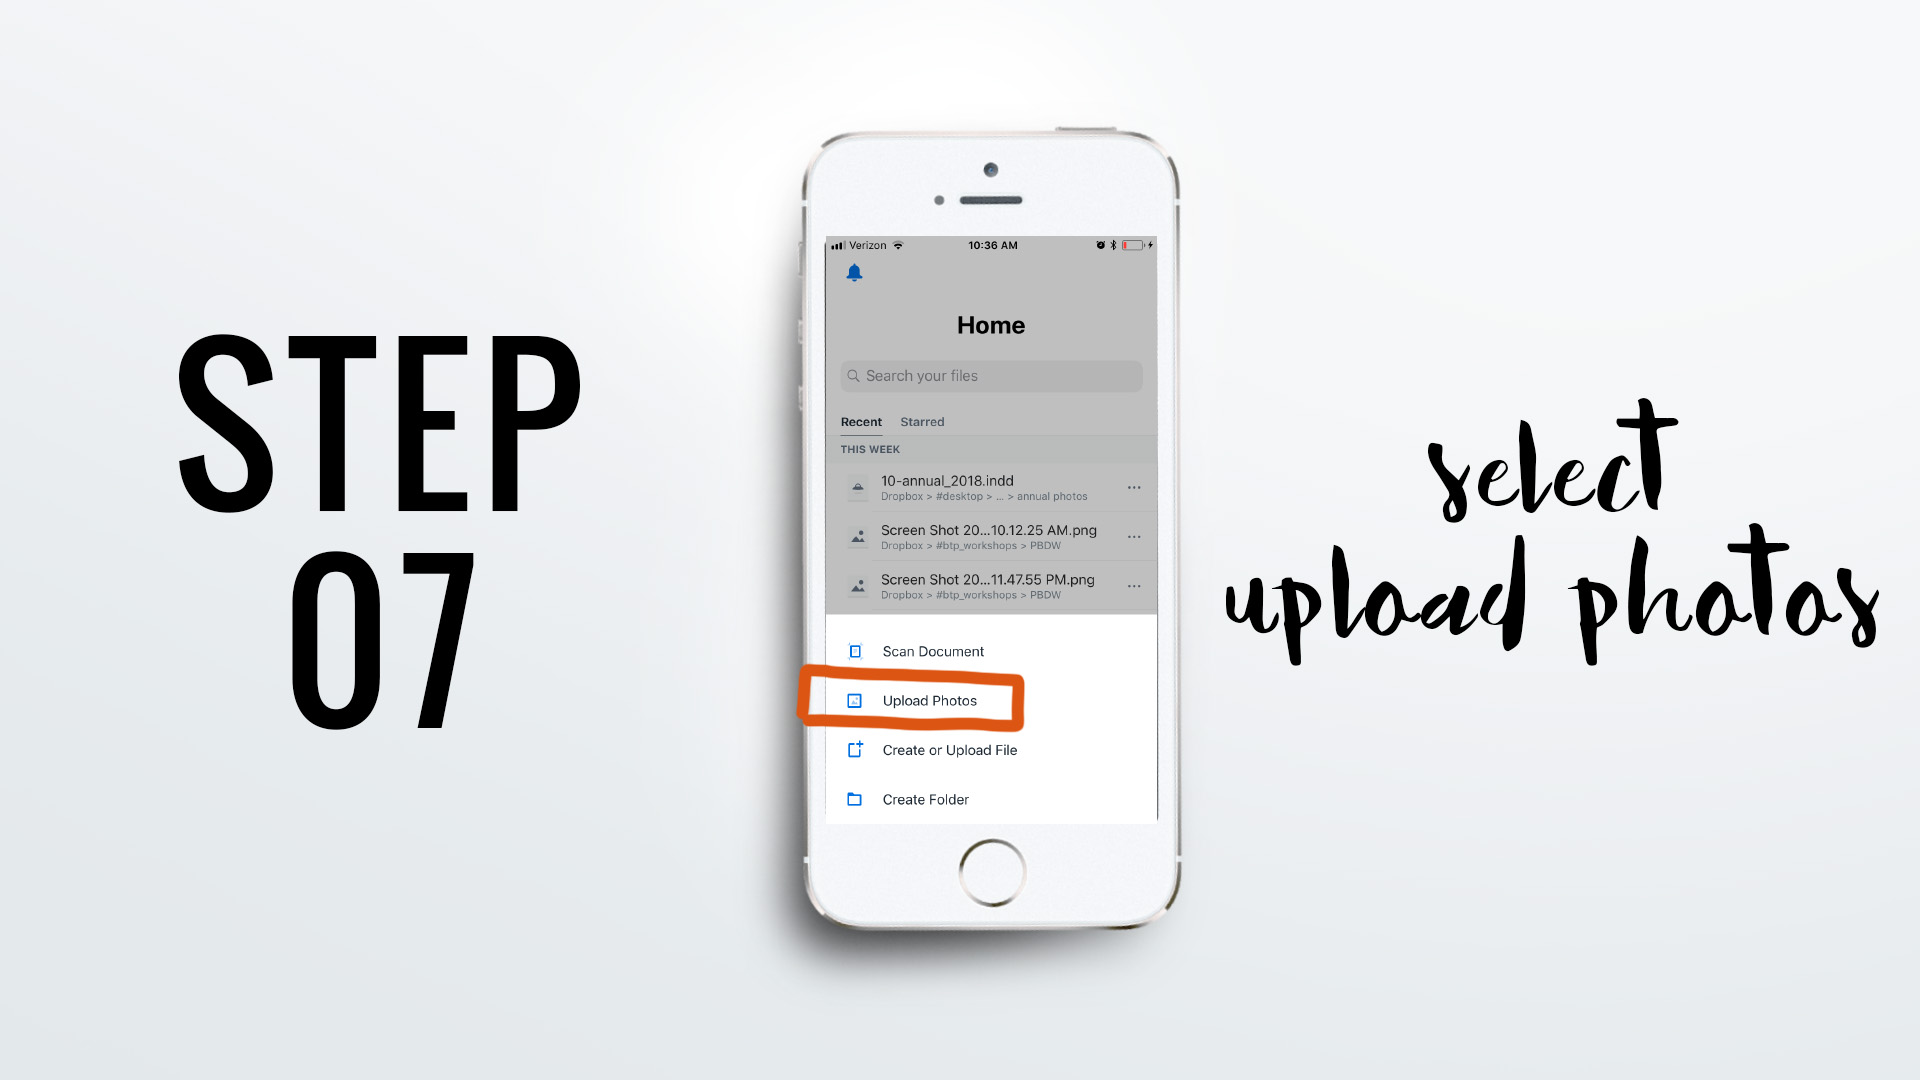
STEP 07: SELECT UPLOAD PHOTOS
With the dialogue box open, select “Upload Photos”.
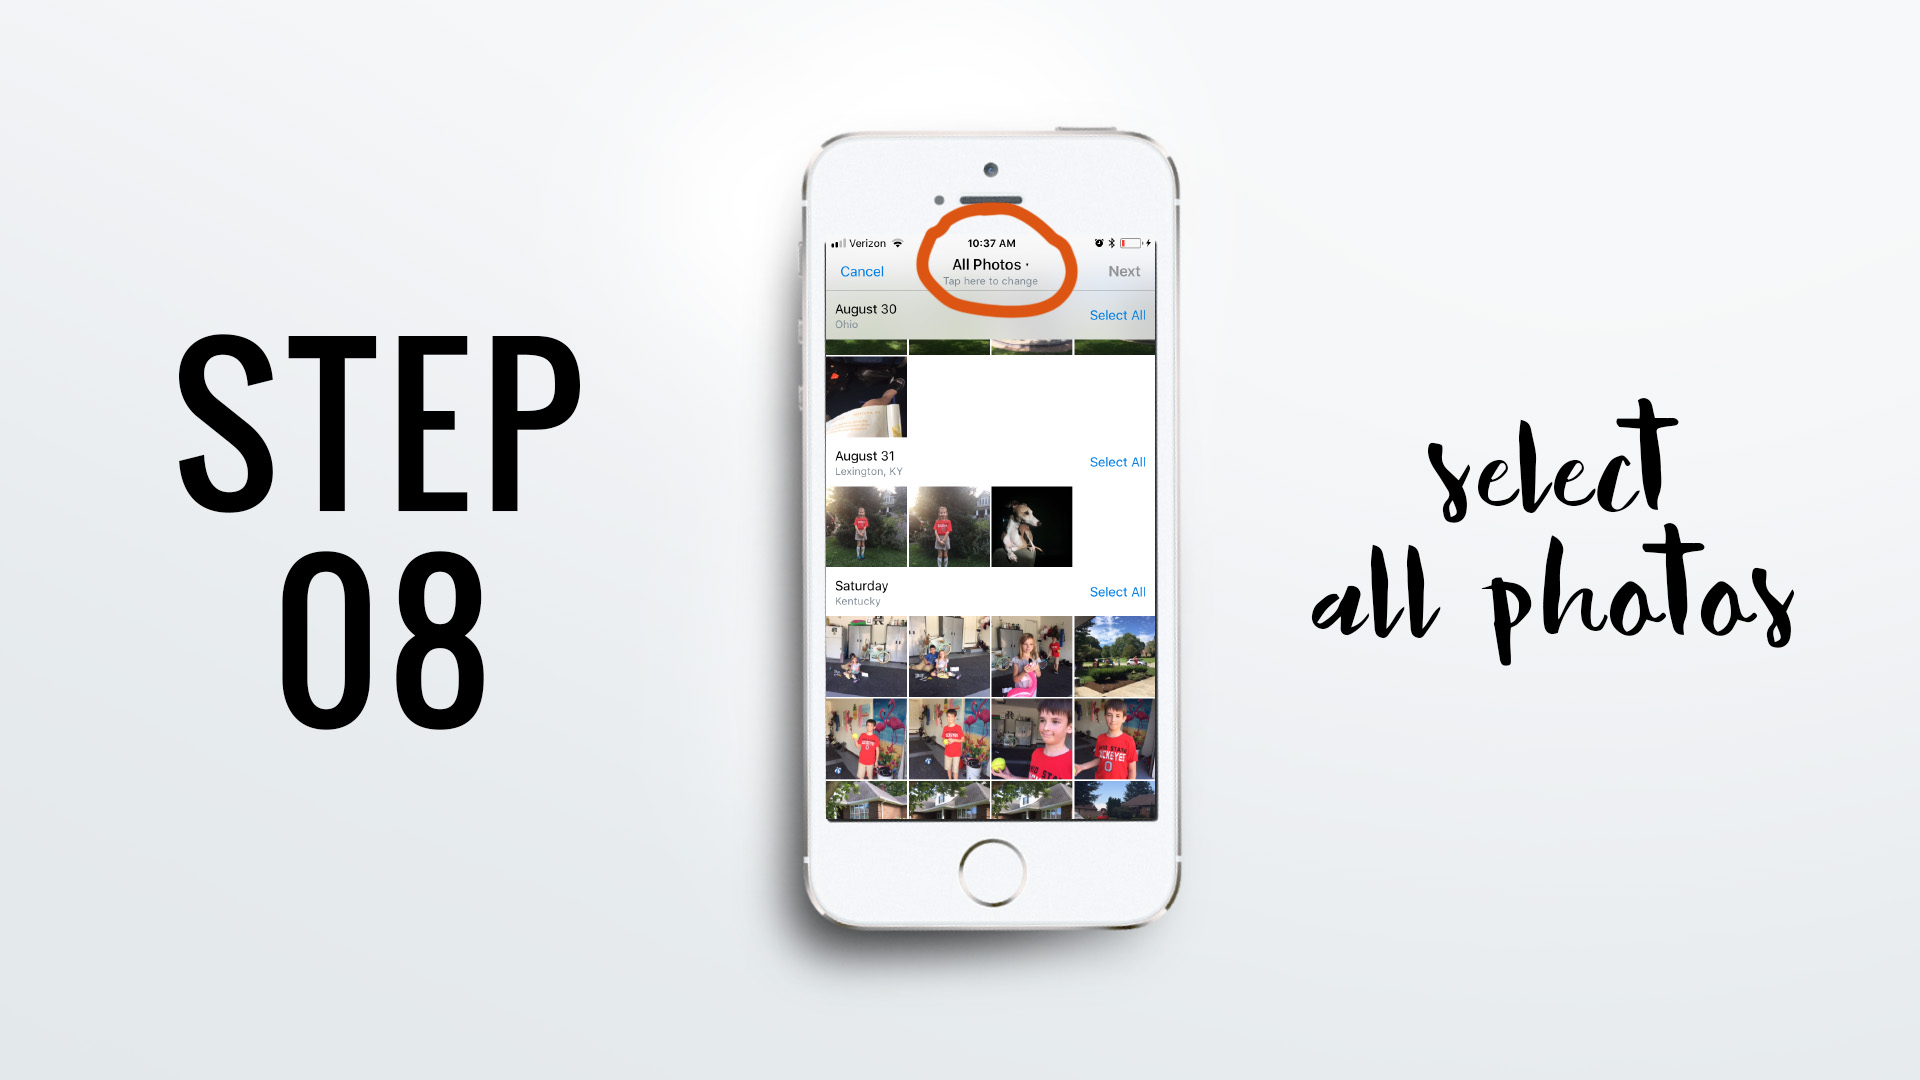
STEP 08: SELECT ALL PHOTOS
By selecting “Upload Photos”, the
In order to get to the “Favorites” folder, I need to tap “All Photos” at the top center of the screen.
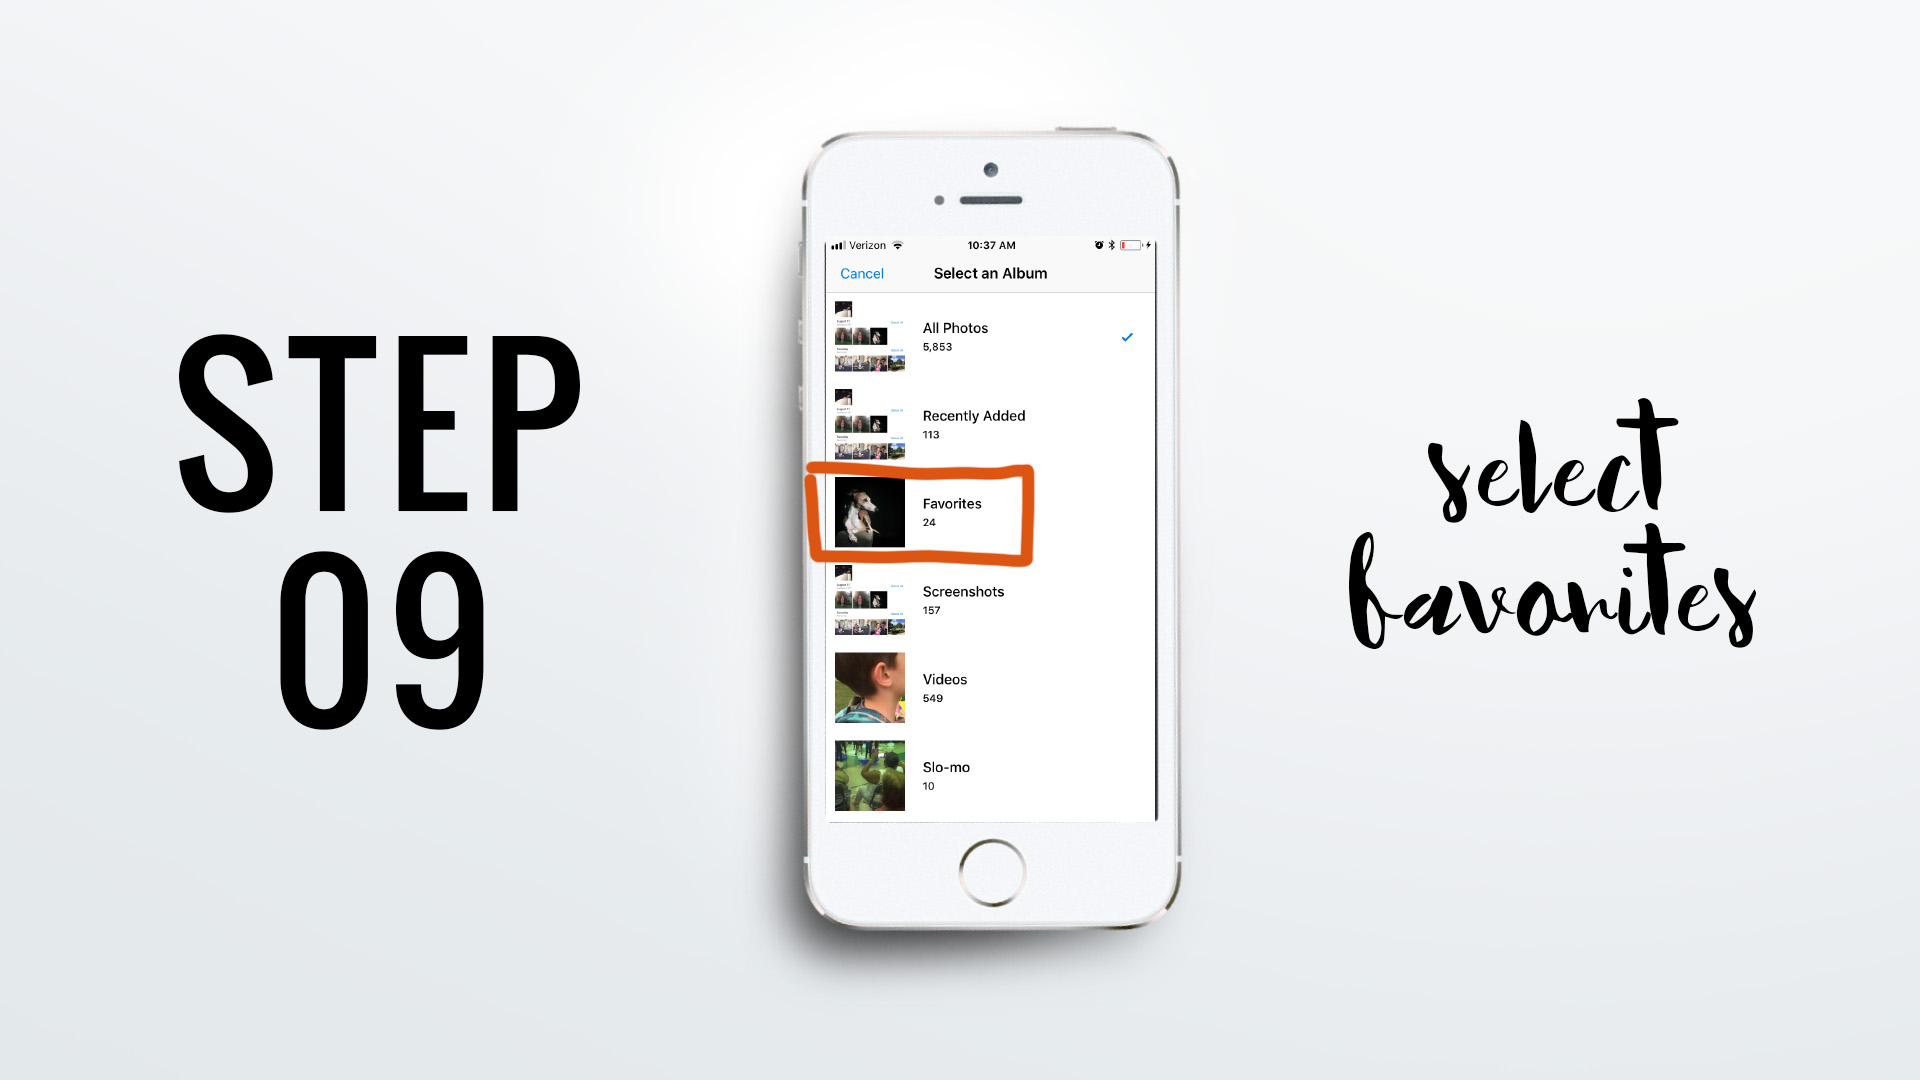
STEP 09: SELECT FAVORITES
Now I see all of the albums created within the photos app and I can tap “Favorites” in order to see those photos.
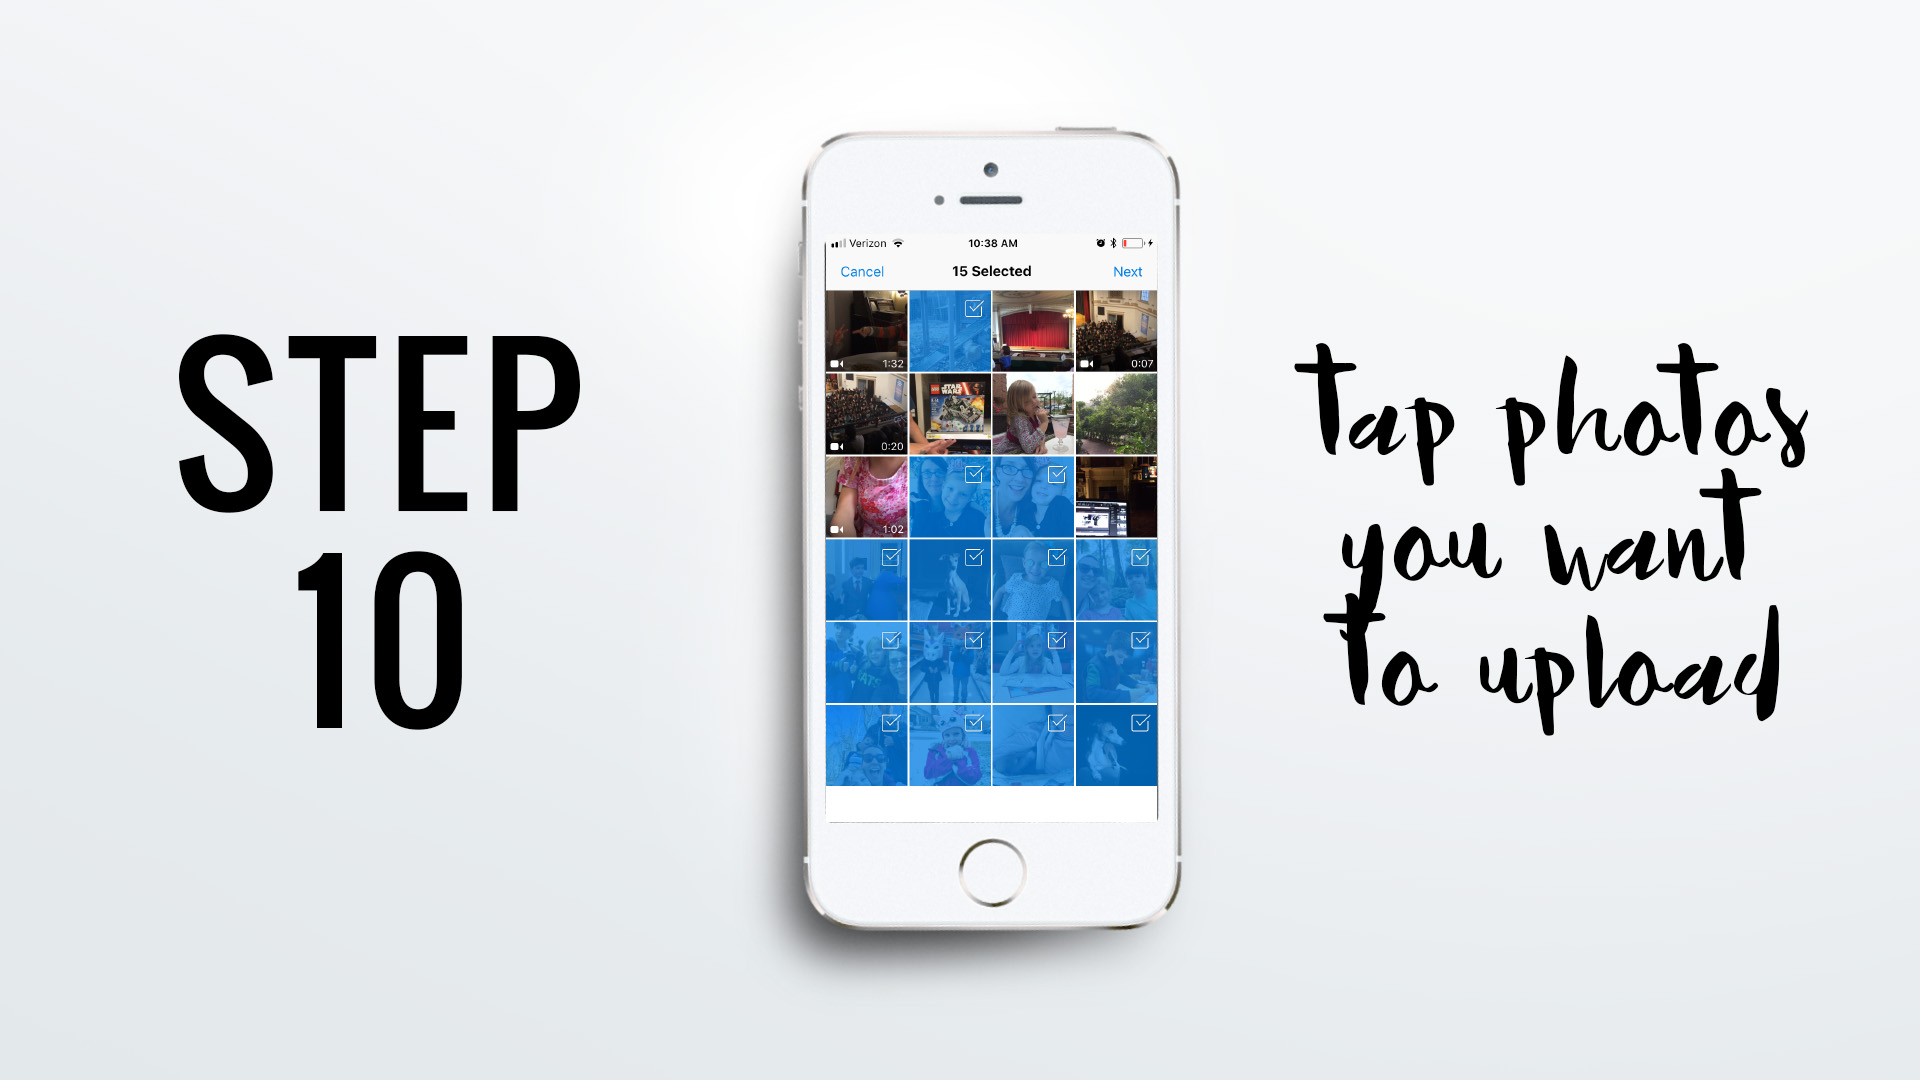
STEP 10: TAP PHOTOS YOU WANT TO UPLOAD
Now you have to tap the photos you want to upload. Unfortunately, there is not a Select All function so you’ll have to tap each one.
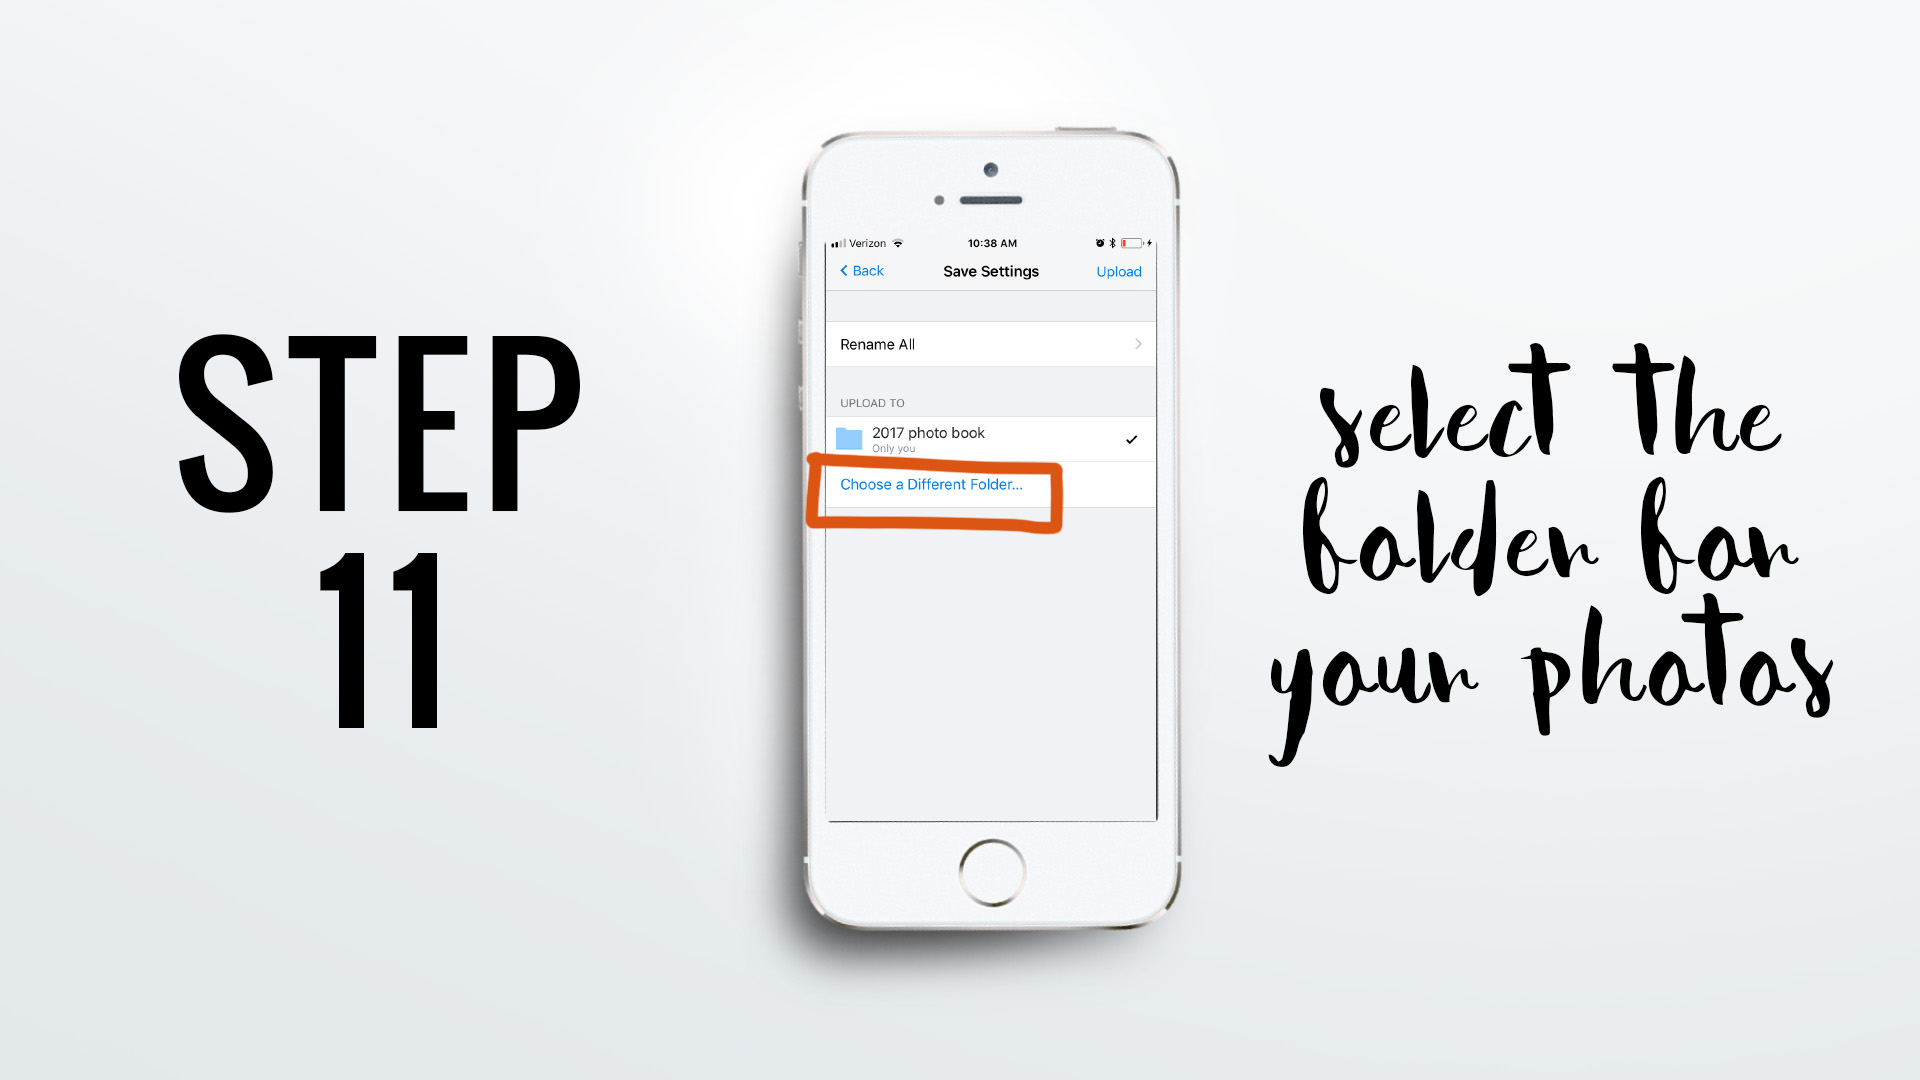
STEP 11: SELECT THE FOLDER FOR YOUR PHOTOS
Within the
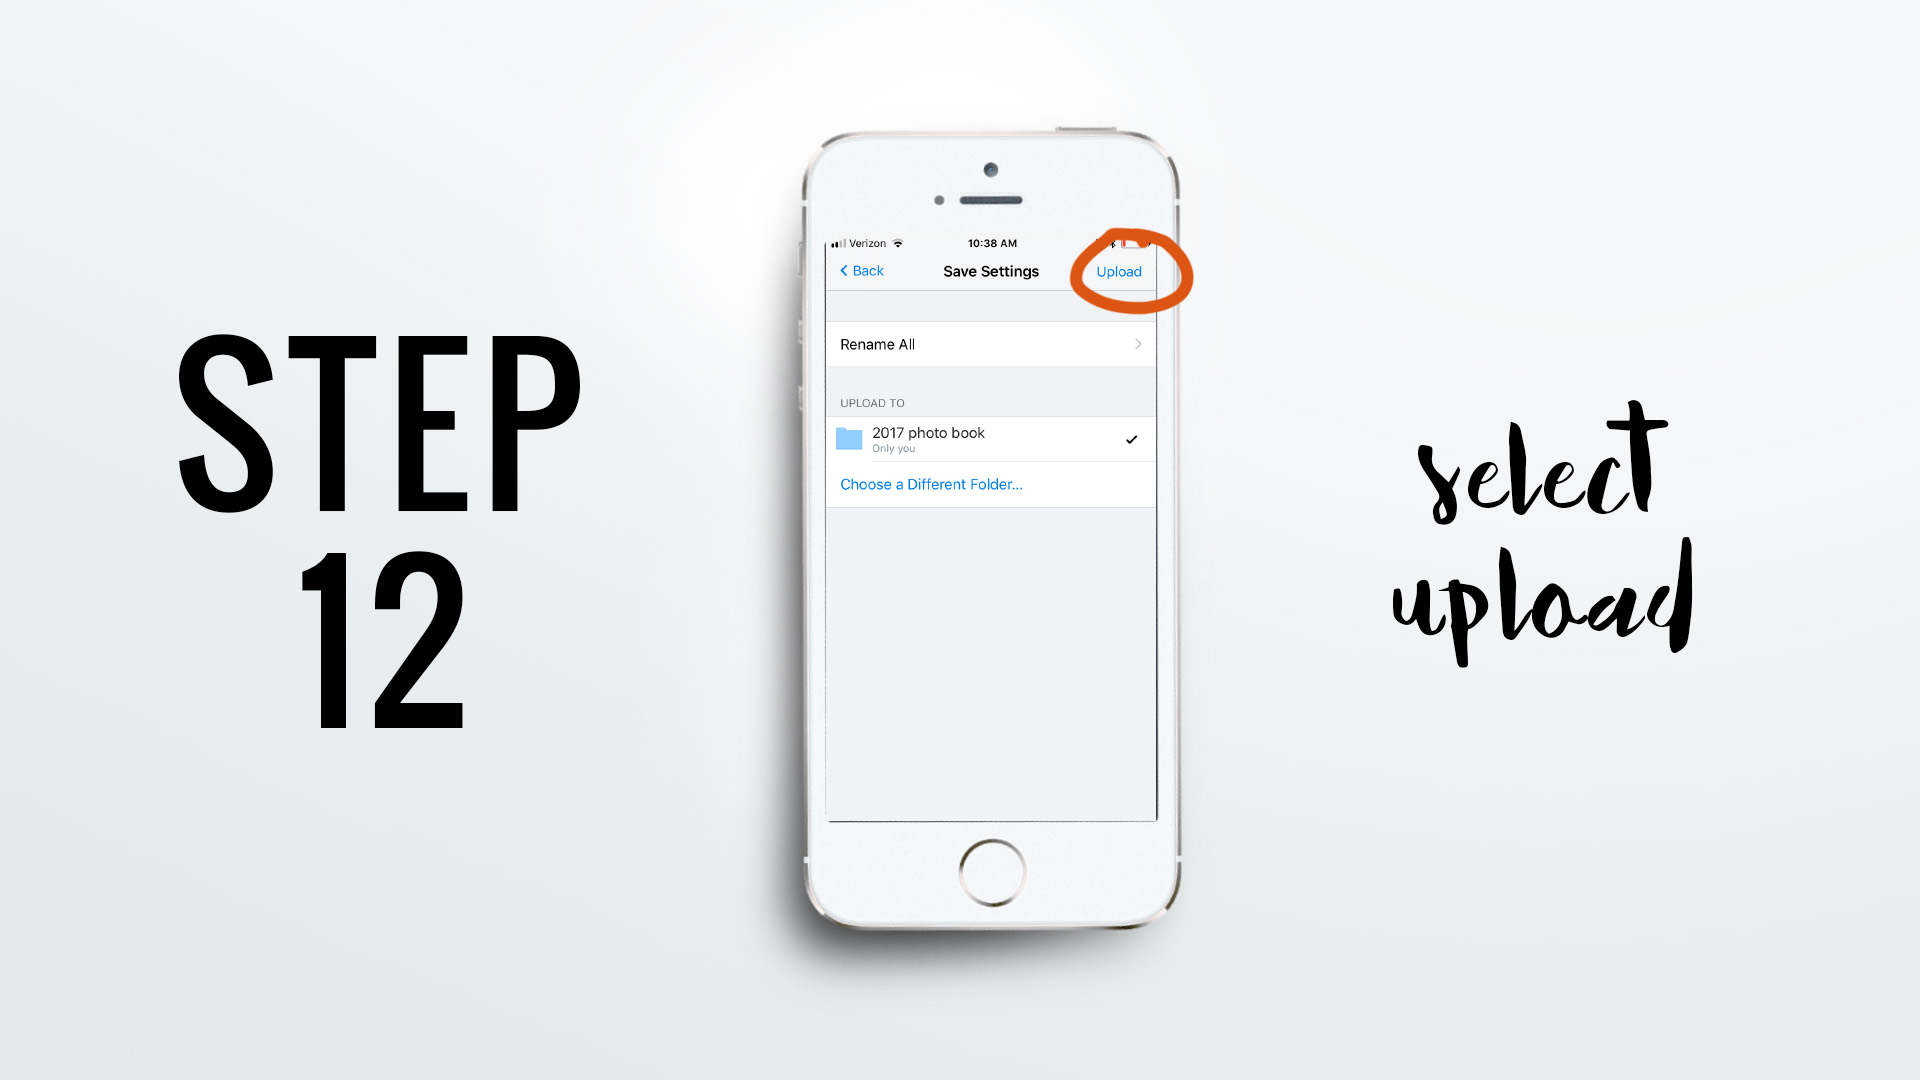
STEP 12: SELECT UPLOAD
Now that you’ve selected the appropriate folder, all you have to do is tap “Upload” and the photos will upload from the photos app to within
Bonus Tip:
Once you’ve uploaded your favorite photos, you may want to go back into your “Favorites” album in your Photos app and un-heart them so you don’t lose track of what you’ve already uploaded. And if you like to keep a tidy Photos app, you can even delete the photos because you know they’ve been uploaded to a digital location.


