 Question: How do you edit your photos?
Answer: So even though I had a difficult time getting Christmas card photos, I thought today I would show you how I edited my fall photos.
First, I want to stress, I’m not the best photo editor, but I’m happy to show you what I’m doing at the moment. Usually my editing is minimal and has to happen pretty quickly.
Here are my basic steps.
1. Adjust exposure.
2. Adjust white balance.
3. Adjust the tone curve.
4. Adjust any color saturations or luminance.
5. Apply any specific crop.
6. Apply a slight vignette.
Now with fall photos, I want to play up the beautiful fall colors. So here is an extra step I did with these photos that I do not typically do on my photos. And it’s a new feature in LR5 – radial filter. If you haven’t used this tool yet, I really like it!
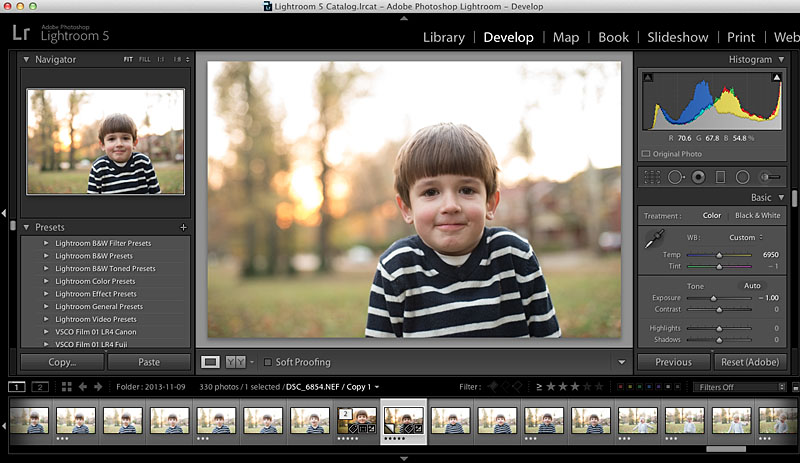
So let’s take a look at what I did for this straight out of the camera photo:
 The first step was to adjust my white balance and exposure.
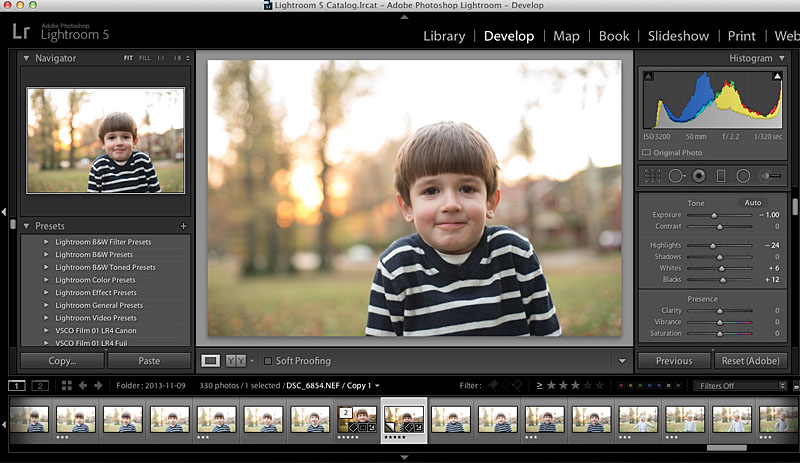
 Then I make some adjustments to the highlights, shadows, whites, and blacks.
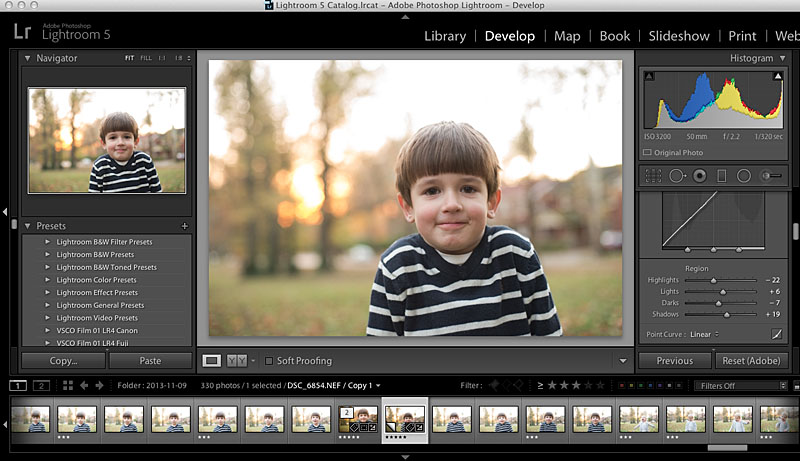
 Next up, the tone curve.
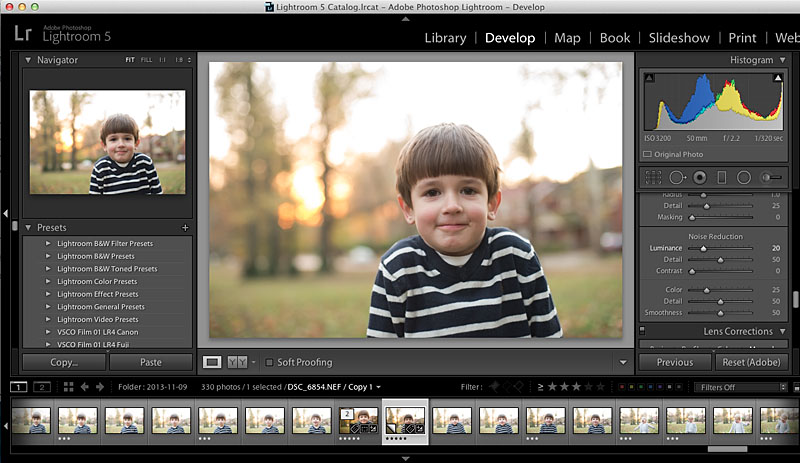
 Then a little Noise Reduction because even though this was outside, it was getting late and my camera was set to ISO3200.
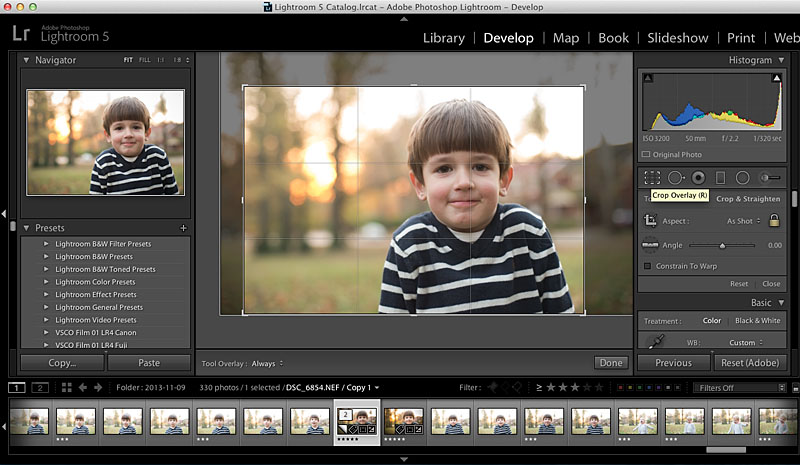
 A crop…for this photo, I used the rule of third guide within Lightroom.
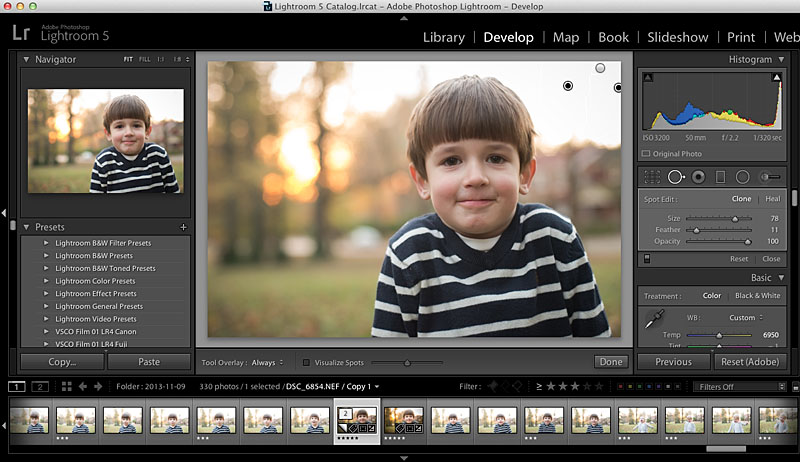
 Then I cloned out a few of the distracting elements in the background, to the right.
Next step, I get to use this awesome radial filter tool in Lightroom 5. This tool allows adjustments to be made, in this case the background, without affecting the subject. And you can invert it as well. So I wanted to lower the exposure and increase the saturation in the background. This plays up the fall-ness in the photo.
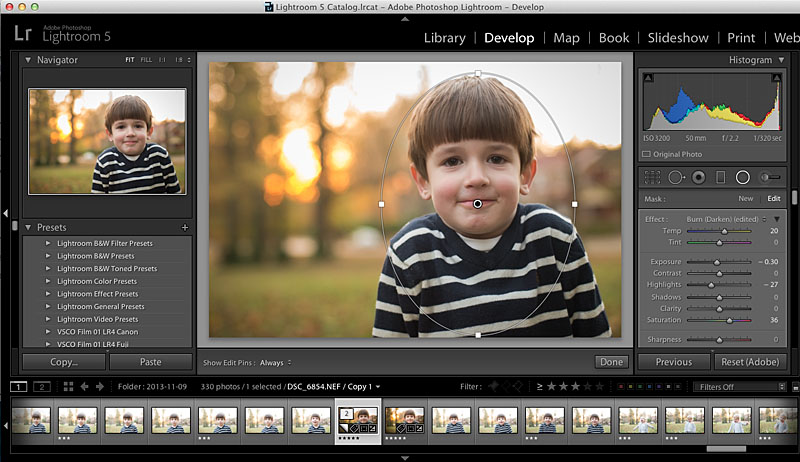
If you don’t have an earlier version of Lightroom, you can always use the adjustment brush to select the background. The radial filter is just a faster option!
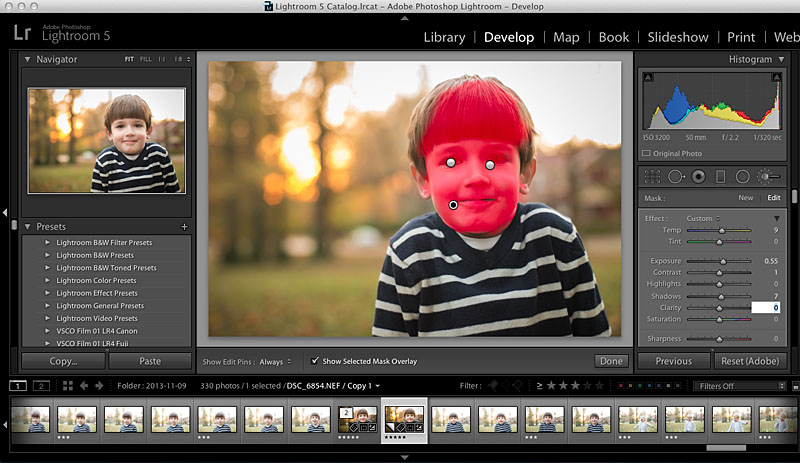
Finally, I make a couple more edits to his face using the Adjustment Brush tool. I lighten his eyes ever so slightly, reduce the circles under his eyes by reducing the saturation and add a little warmth and increase exposure to his face.
And there we have it! Here is my final photo…it’s not perfect but it’s definitely an improvement from where it started.