A while ago I received a question regarding preparation for a photo book. Even though this is not actual book design question, it is a foundational question for what makes photo books really work – the photographs.
 Question:
How much sharpening [do you do] for your book? One frustration for me is that I will get a photo looking good and sharp but then when the book comes back it looks soft. I have looked on the blurb forum and there is so much technical info re the colour proofing that my eyes just glaze over!! Oh and I have tried to crop the photo to the exact size of the blurb template vs just using the blurb resize tool and there doesn’t seem to be that much difference in terms of sharpening.
 Answer:
I’m not sure I have a definitive answer for you but I will share what works for me.
This is one of the hardest things to show / illustrate / test. Also, you may have personal preferences or standards for your photos that are different than mine.
So the best idea is to test specific approaches and see what works for you until you are satisfied.
I was glad to hear you say you tried sizing to the photo to the actual photo box versus using their slider to increase the photo within the box. That is what I was going to suggest.
I typically size my photos @ 300 ppi at the size I want to use in the book. But if you have already tried that…another thing I do in Lightroom is sharpen for print with matte paper when I export. I think I have had better luck with that.
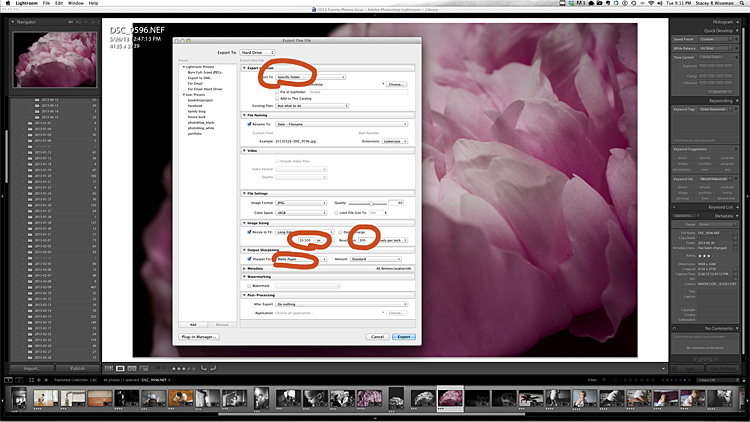
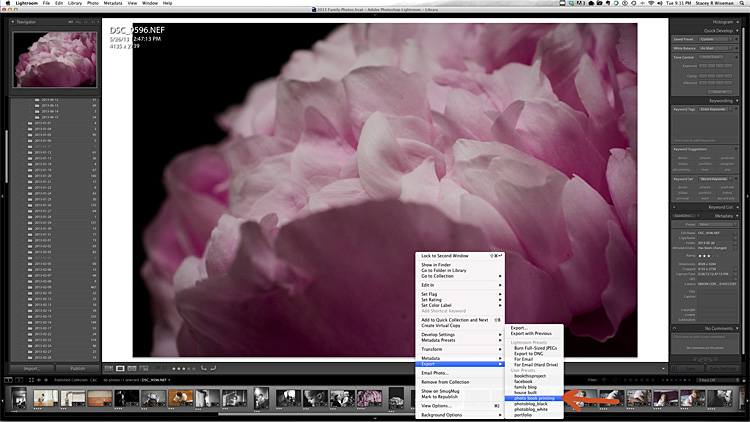
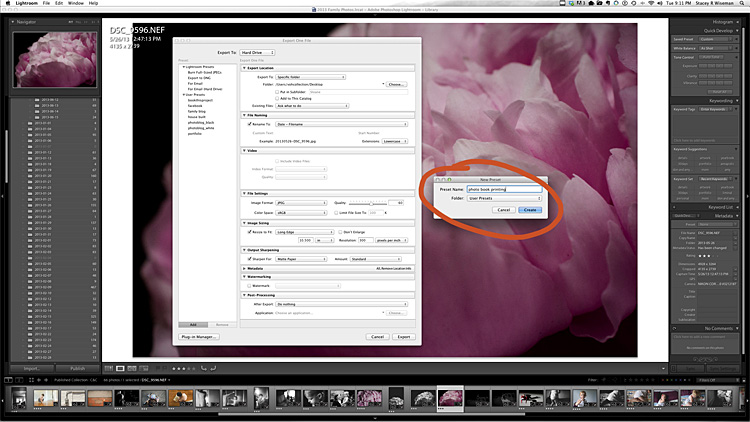
[divider] When I have these areas established, I will go to the left and select, Set a New Preset. This will save all of the settings for future use. This will likely change for each book project, but it’s easy to adjust it as needed.
[divider] Now, whenever I have a photo I want to go in my photo book, I just right click on the photo, go to export and then select the preset established for my book.